Sooooo I did a *little* engine bay cleanup/rewiring
 1/9/10, 04:24 PM
#1
GT Member
Thread Starter
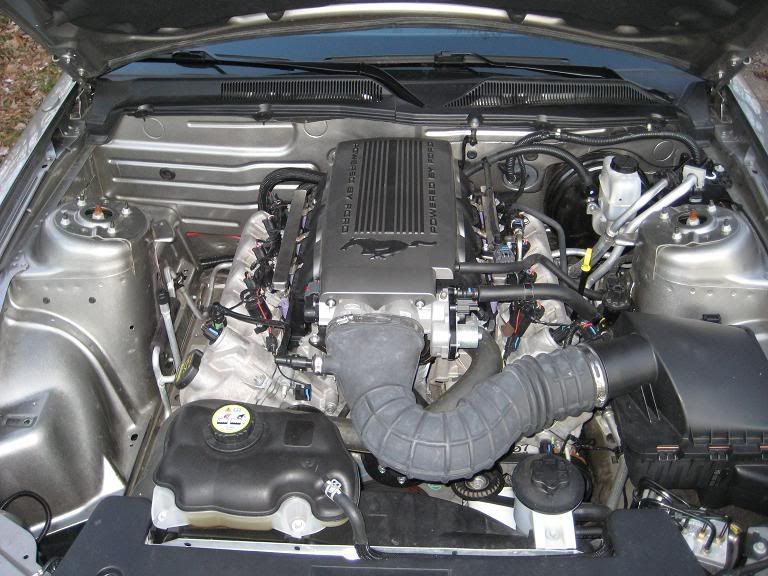
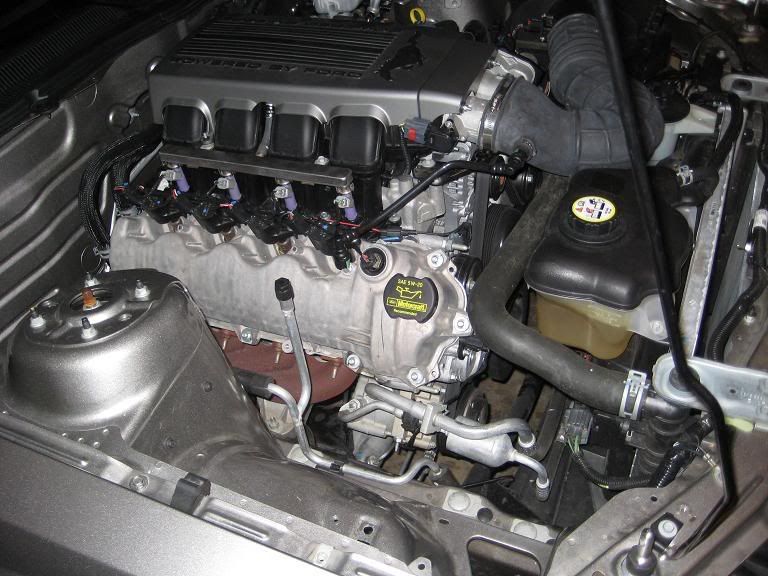
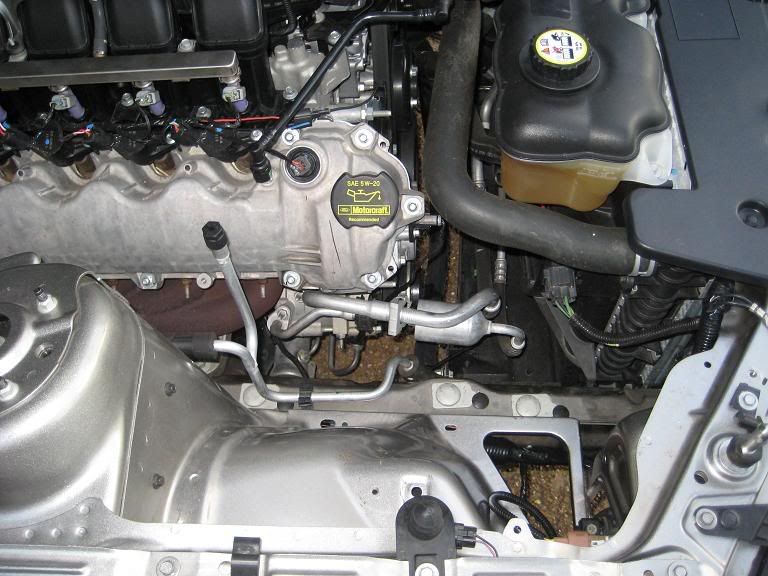
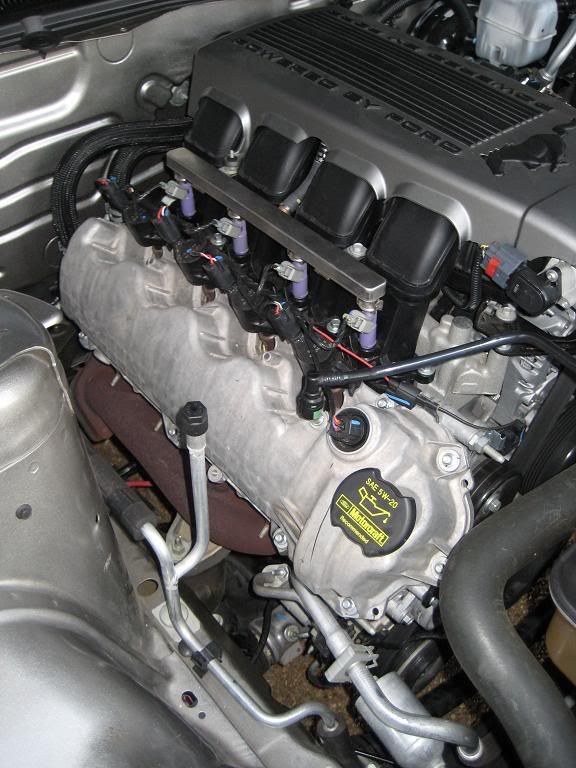
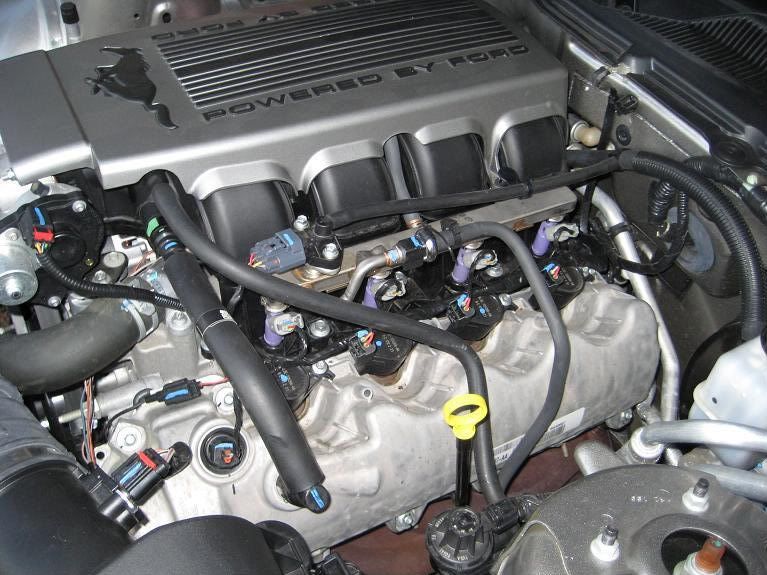
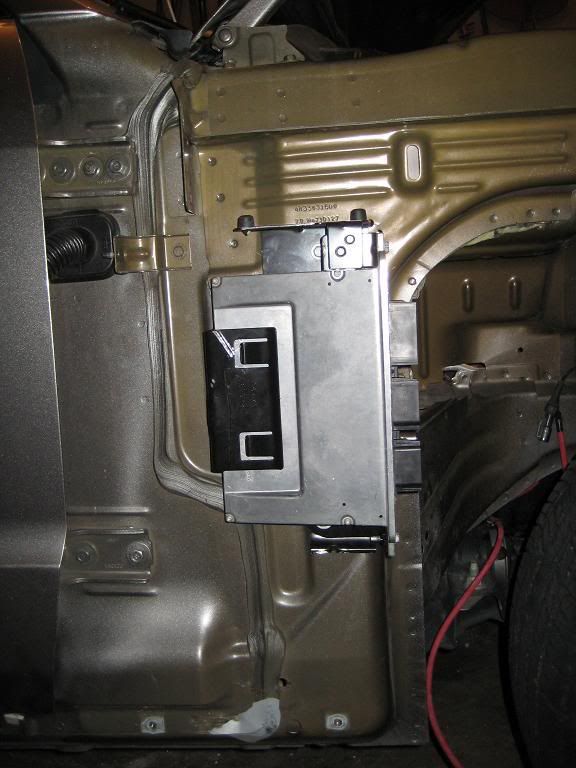
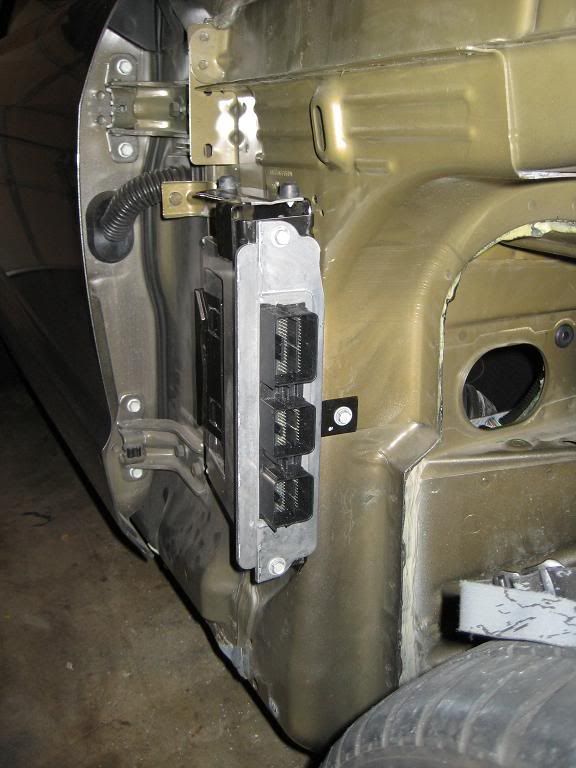
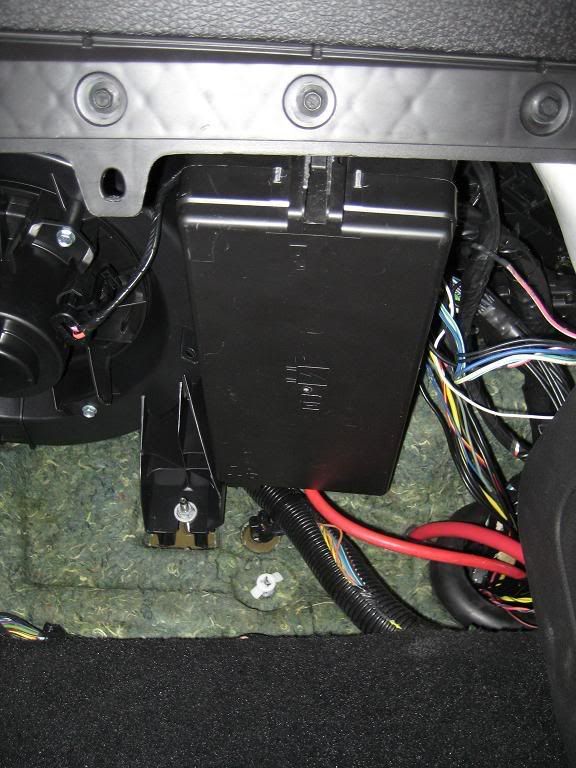
Ever since I got my GT back in April I wasn't happy with the way Ford ran all the wiring harnesses in the engine bay.. so I did something about it while on Christmas vacation back home! All in all it took me roughly one week to hide/mount everything and extend wires as necessary and I ended up moving the PCM, Fuse brick, and battery. It wasn't a solid week of nonstop working and a lot of time was spent trying to figure out where to mount the PCM and fusebox so this could probably be done in about 3 days if I had to do it again. My overall goal was to have as little wiring in the engine bay as possible and to be able to hide everything else where you couldn't see it. I mounted the PCM inside the passenger fender well behind the badge on the fender using the stock mounting bracket that I modified slightly. The fuse brick was a little bit more difficult because I had to modify what was the bottom of the fuse brick in order to hide in the cabin underneath the glove box. But the way I did it, you cannot see it while sitting normally in the passenger seat! As for the battery I relocated it to the trunk and have some special plans for the trunk as soon as I can afford the material... **** economy lol Anyways, enough with the description and onto the pics 


 1/9/10, 05:32 PM
#5
GT Member
Thread Starter
Trust me, a CAI, long tubes, and powdercoated valve covers are among my next mods for sure. The only thing holding me back is money right now lol
2L9IWON - Im just the average 21yo college student with minimal car work experience but I believe anyone with a basic knowledge of soldering, a warm garage, and patience can do this job seeing as I did this 100% by myself! Really all that extending/shortening a wire involves is measuring how long the entension or length to be removed has to be and then cut the appropriate length and then solder the new wire in and cover the solder joints with heat shrink and thats it. Honestly, there was quite a few wires that had be to be either shortened or lenghtened (in the ball park of 150 wires in total) but wasnt too bad once I got going.
2L9IWON - Im just the average 21yo college student with minimal car work experience but I believe anyone with a basic knowledge of soldering, a warm garage, and patience can do this job seeing as I did this 100% by myself! Really all that extending/shortening a wire involves is measuring how long the entension or length to be removed has to be and then cut the appropriate length and then solder the new wire in and cover the solder joints with heat shrink and thats it. Honestly, there was quite a few wires that had be to be either shortened or lenghtened (in the ball park of 150 wires in total) but wasnt too bad once I got going.


 1/9/10, 07:24 PM
#10
Great work!
Really impressive.
Only thing I would ask is now it looks like everything is inthe driver side while the passenger side is devoid of anything. Do you plan to move anythig over to make it look a bit more balanced when you pop the hood up?
Really impressive.
Only thing I would ask is now it looks like everything is inthe driver side while the passenger side is devoid of anything. Do you plan to move anythig over to make it look a bit more balanced when you pop the hood up?
1/9/10, 08:08 PM
#11
GT Member
Thread Starter
cdynaco - Honestly I looked at the PCM pretty closely when I had it out and its sealed around every single corner, every plug has a rubber seal on the male end that plugs into the PCM, and each individual wire has its own seal around the wire. So based on that Id have to say its pretty water resistant if not just about water proof. And because of where I mounted it, the PCM is just about as protected from water now as it was under the hood. And as for cold temps, its been in the teens and lower where I live for the past week and I haven't thrown a single code or had any problems whatsoever. So until or if I ever experience any problems im just gonna let it ride out where its at :thumbs:
2k7gtcs - Yep, some of my next mods include moving the coolant expansion tank over where the stock air box is and making my own CAI similar in design to how Kenne Bell has their CAI going into the front bumper under the passenger headlight. And after I do that I'm going to see what else I can move around or hide on the drivers side.
2k7gtcs - Yep, some of my next mods include moving the coolant expansion tank over where the stock air box is and making my own CAI similar in design to how Kenne Bell has their CAI going into the front bumper under the passenger headlight. And after I do that I'm going to see what else I can move around or hide on the drivers side.
1/9/10, 08:17 PM
#13
cdynaco - Honestly I looked at the PCM pretty closely when I had it out and its sealed around every single corner, every plug has a rubber seal on the male end that plugs into the PCM, and each individual wire has its own seal around the wire. So based on that Id have to say its pretty water resistant if not just about water proof. And because of where I mounted it, the PCM is just about as protected from water now as it was under the hood. And as for cold temps, its been in the teens and lower where I live for the past week and I haven't thrown a single code or had any problems whatsoever. So until or if I ever experience any problems im just gonna let it ride out where its at :thumbs:
2k7gtcs - Yep, some of my next mods include moving the coolant expansion tank over where the stock air box is and making my own CAI similar in design to how Kenne Bell has their CAI going into the front bumper under the passenger headlight. And after I do that I'm going to see what else I can move around or hide on the drivers side.
2k7gtcs - Yep, some of my next mods include moving the coolant expansion tank over where the stock air box is and making my own CAI similar in design to how Kenne Bell has their CAI going into the front bumper under the passenger headlight. And after I do that I'm going to see what else I can move around or hide on the drivers side.
 1/9/10, 09:29 PM
#17
Mach 1 Member
WOW that looks awesome. Definitely wish I had the time and patience to do that. If I didn't pay for that extended warranty, then I would have done it once I decided to do that. Lets see, I still have 6 yrs on my extended warranty 
1/9/10, 09:32 PM
#18
GT Member
Thread Starter
Yes, patience was definitely a virtue when doing this.. the occasional meal and beer helped too 
2k7gtcs - what seems so impossible about it? Im confident that I can walk anyone through this provided you had some basic tools and are somewhat mechanically inclined. I have some other pics and details of how I did it all but havent uploaded them yet.
Scrape - yeaaaa that whole warranty thing has my father pretty pissed off that I did this to my mustang... especially considering the odometer just rolled 10k miles a day before I started ripping it to pieces lol oh well
Last edited by memphisstylee; 1/9/10 at 09:35 PM.
1/9/10, 09:36 PM
#19
Yes, patience was definitely a virtue when doing this.. the occasional meal and beer helped too
2k7gtcs - what seems so impossible about it? Im confident that I can walk anyone through this provided you had some basic tools and are somewhat mechanically inclined. I have some other pics and details of how I did it all but havent uploaded them yet.
2k7gtcs - what seems so impossible about it? Im confident that I can walk anyone through this provided you had some basic tools and are somewhat mechanically inclined. I have some other pics and details of how I did it all but havent uploaded them yet.

My car spends enough time down for mods as it is. I've sworn off mods for a while after I get it off of jackstands this week hopefully.
1/10/10, 05:59 AM
#20
Team Mustang Source
I see a lot of projects here that are impressive, and the occasional one that just leaves me in total awe. This is one of the second type without a doubt. Fantastic job on this...