Moleskin (for window tint) install w/pics and vids
 11/5/06, 09:57 AM
#1
Thread Starter

Moleskin (for window tint) install w/pics and vids
Window tint: Moleskin installation
Here's the deal, I've noticed that the Velcro felt has started to separate from its adhesive backing on a small section on the drivers side wiper channel causing the exposed adhesive glue to streak onto the tint when rolled up and down.
My choice was to either replace the Velcro with another strip, or install Moleskin felt in its place. As I have yet to read any negative comments on the use of Moleskin, I opted for the latter.
I obtained a Moleskin kit from Automoleskin.com. Kit comes complete with enough Moleskin to do both sides and a set of install direction.
Here's what I did to replace the Velcro with the Moleskin.
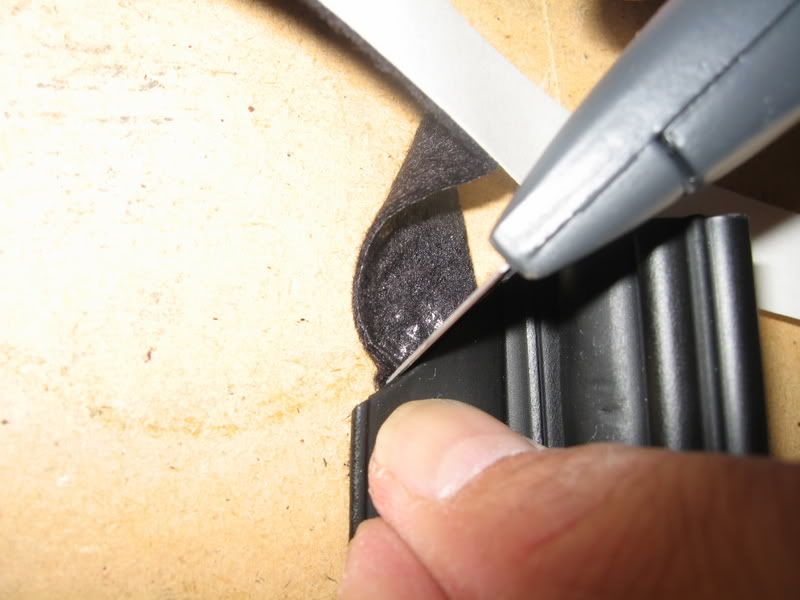
Side by side comparison (Moleskin on left)

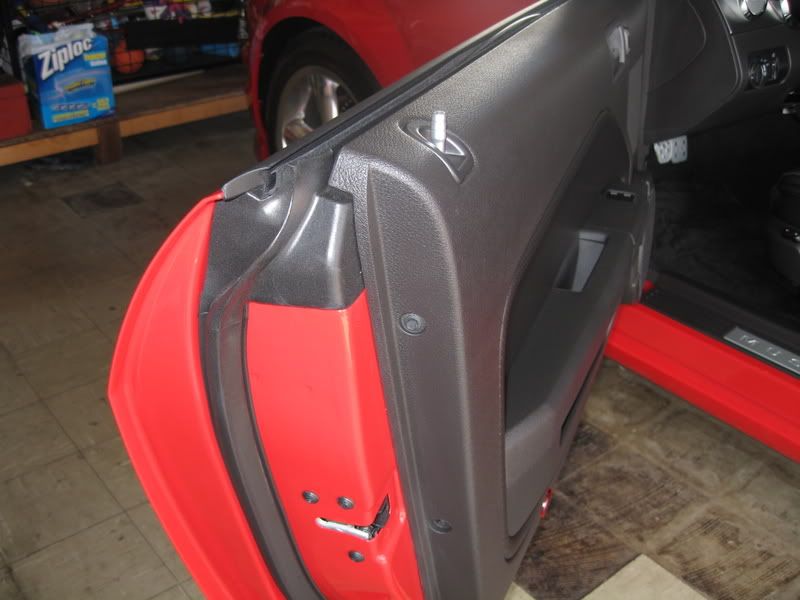
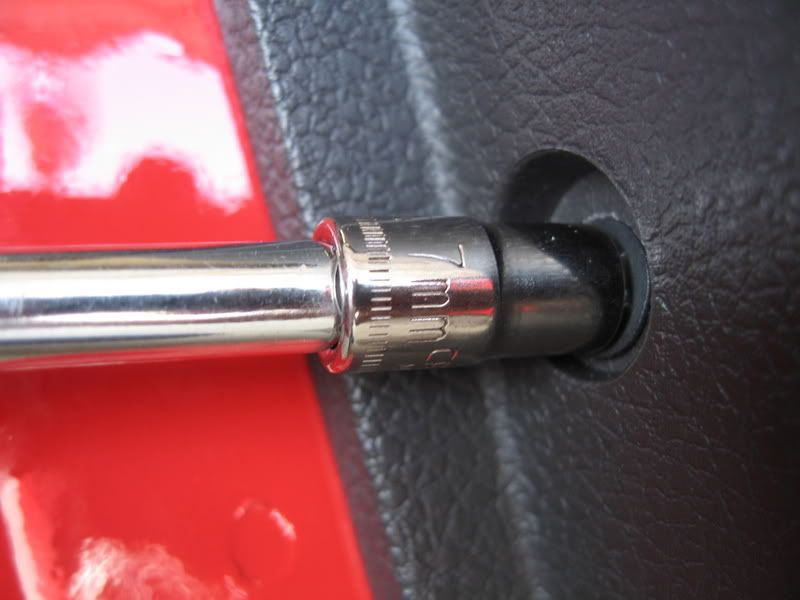
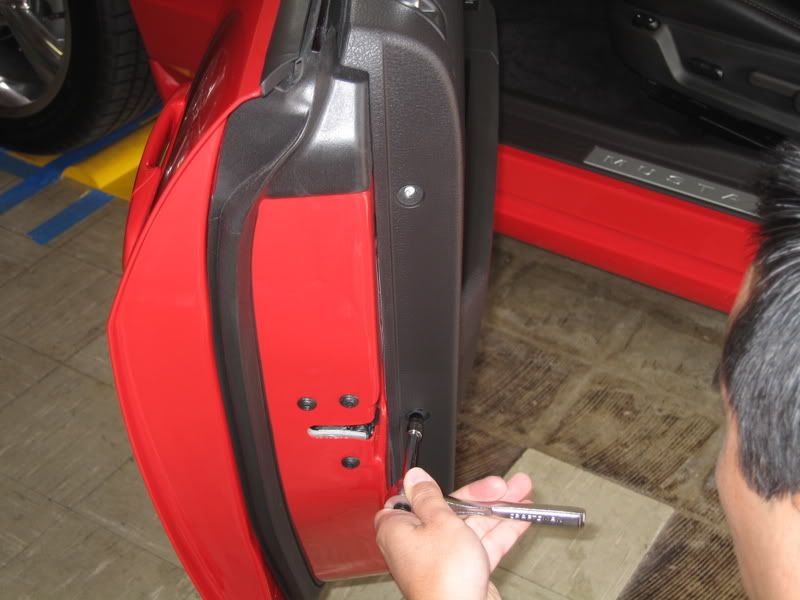
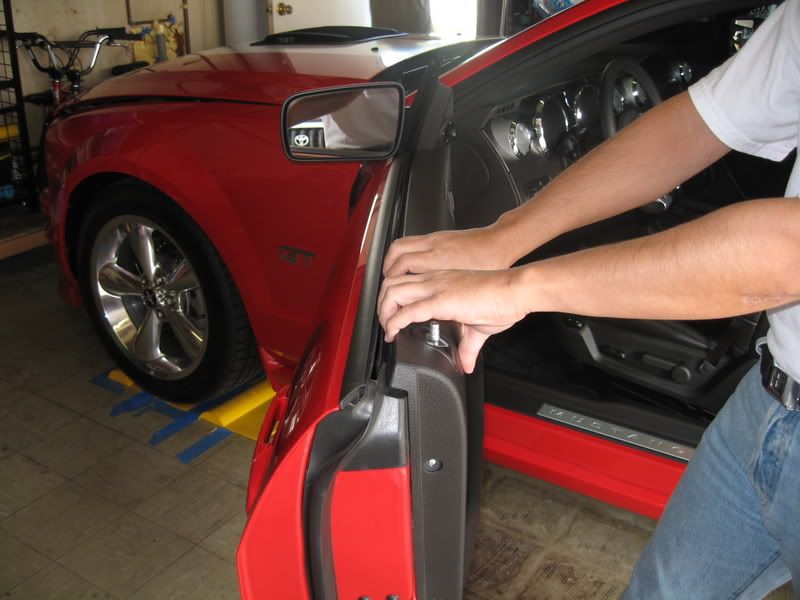
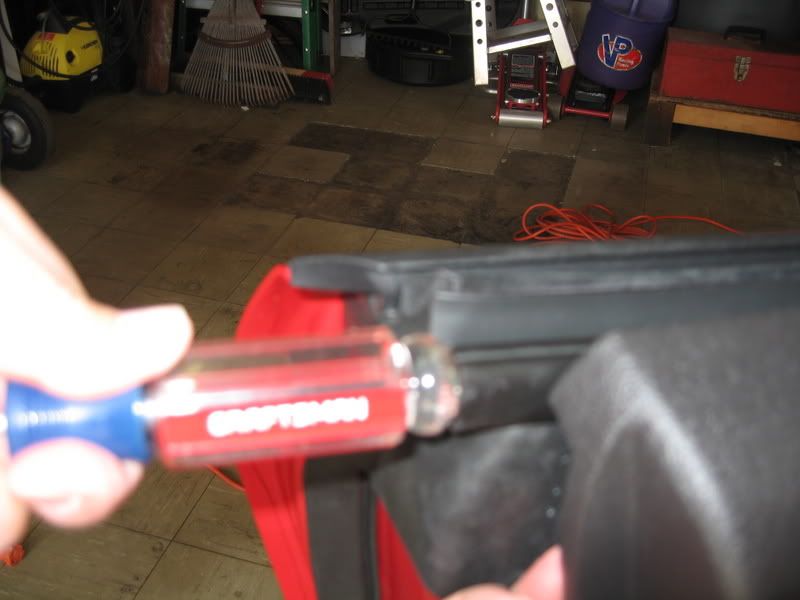
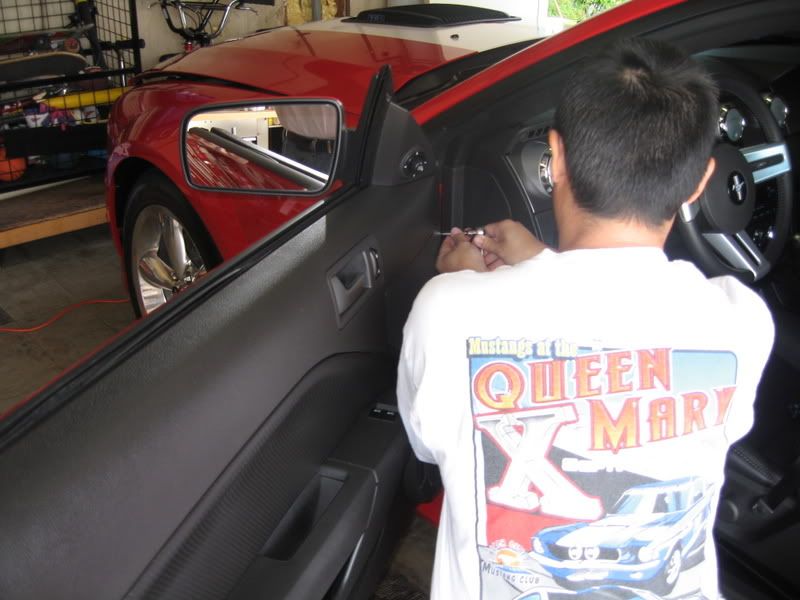
Roll the window down and remove the (3) 7mm screws as shown in the pics below (2 on the back side of the door panel and 1 on the top forward side). I did not find it necessary to remove any more screws or trim pieces to access the wiper channel.
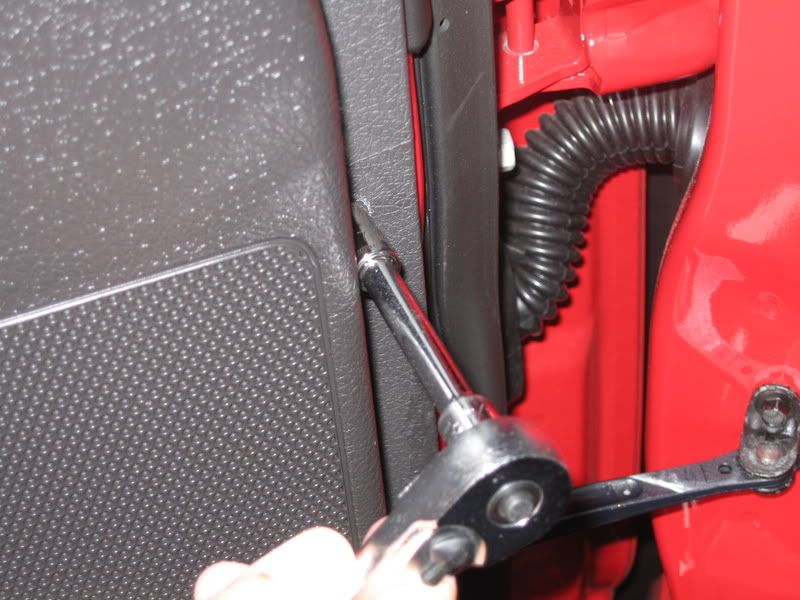
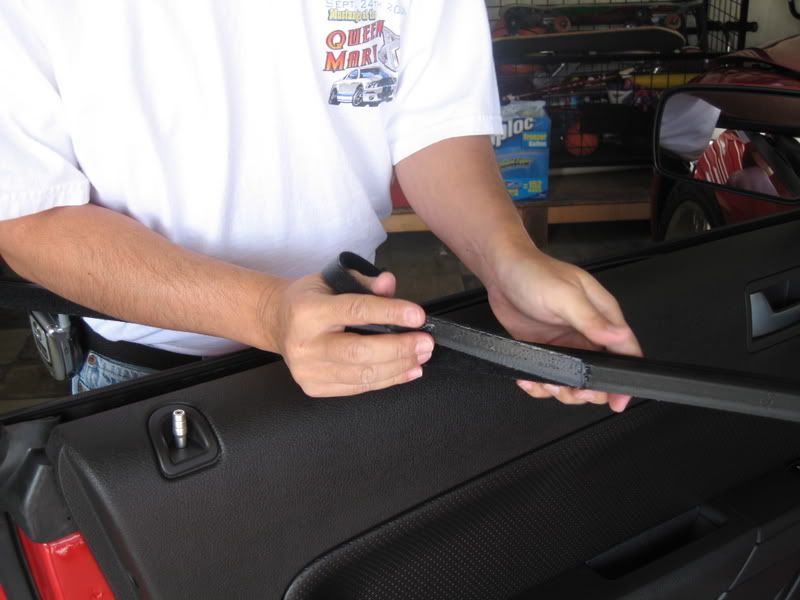
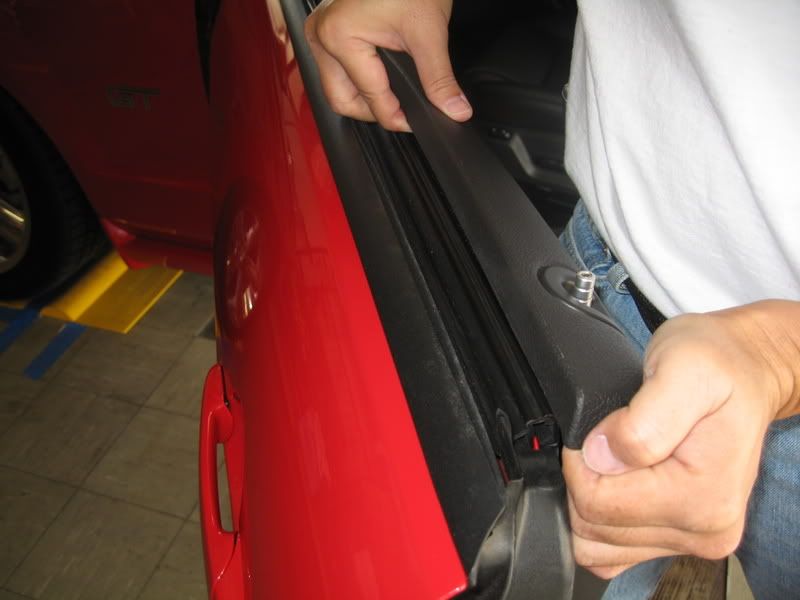
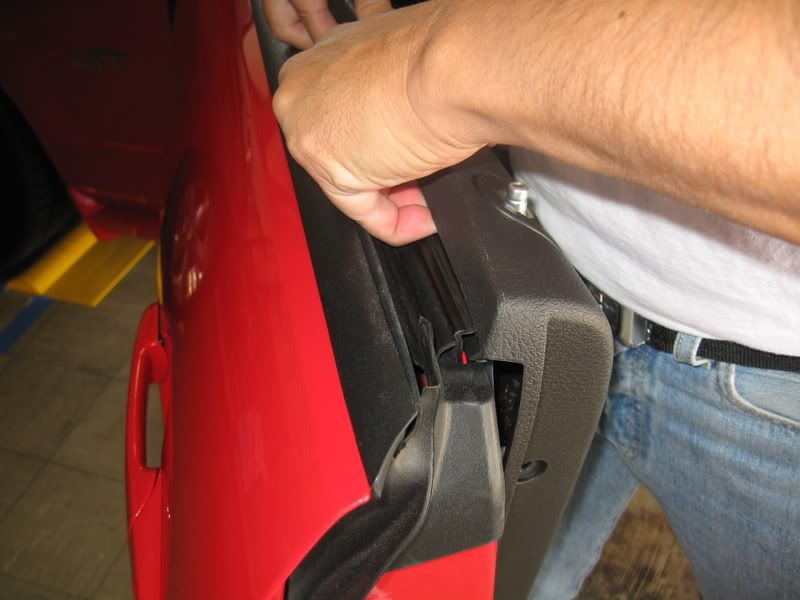
Access and remove the wiper channel. Grasp the top edge of the door panel towards the rear and with your fingers, firmly lift it up and over the channel. This step takes a little bit of forcing, so don't be afraid to really pull up on the door panel. Once the channel is accessible, lift up the channel from its end about half way, then slide the rest out.

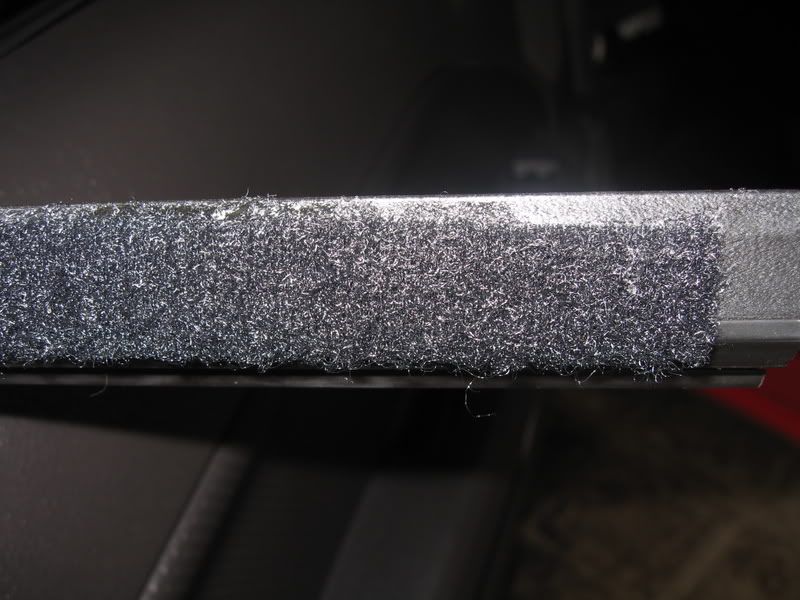
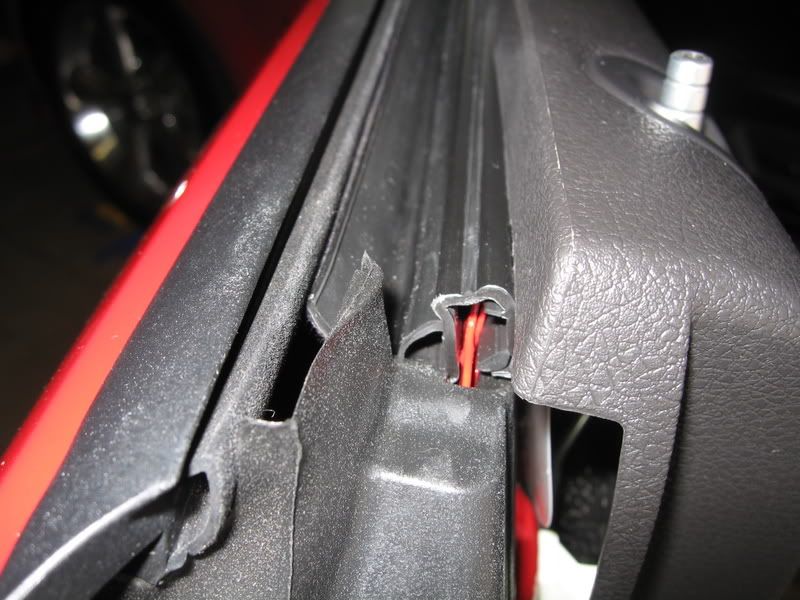
Here you can see where the Velcro has drooped down, exposing the adhesive glue.
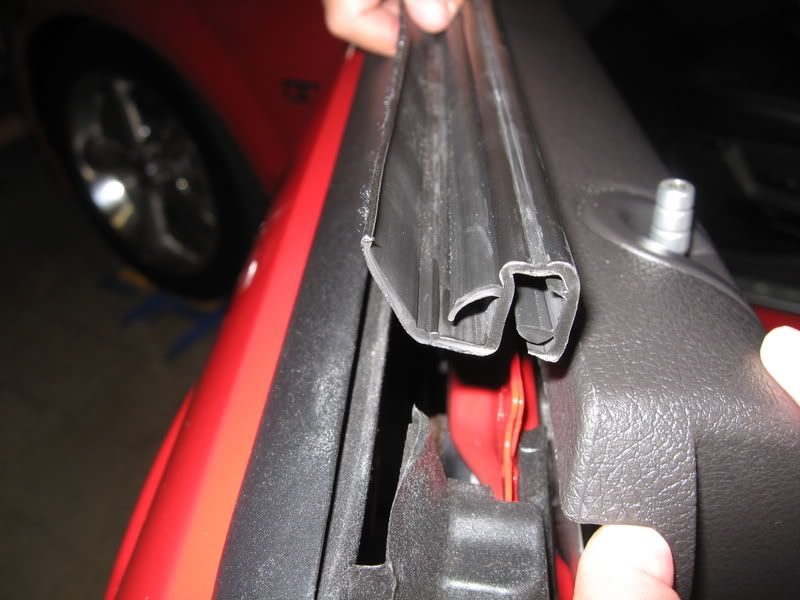
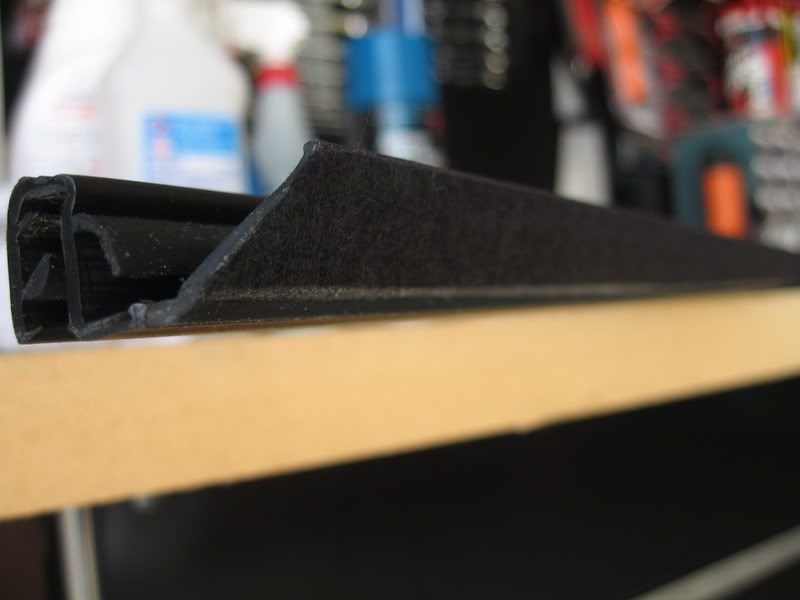
Here is a pic of the orientation of the wiper channel in relation to the track, which it will slide into later.
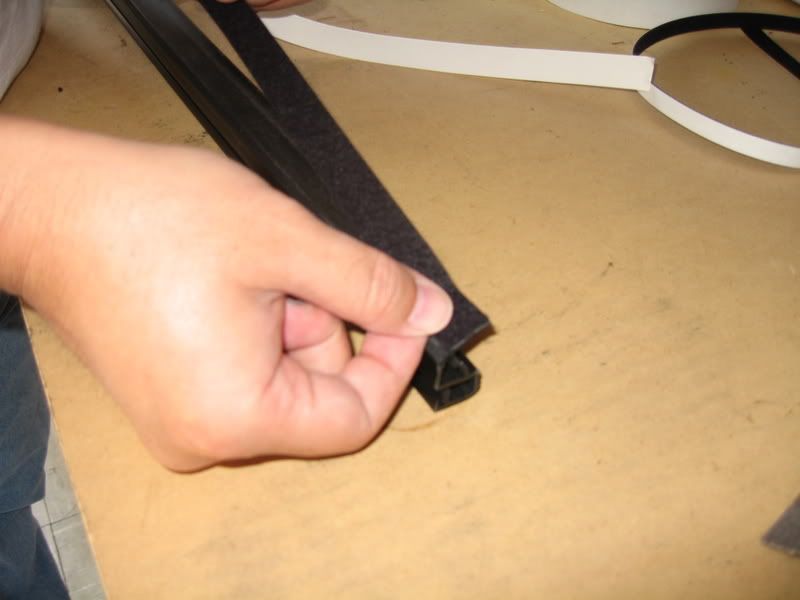
Velcro felt removal. I was afraid that I was going to have a big mess on my hands after I peeled off the Velcro strip. So, in anticipation of it, I used a blow dryer on the Velcro for a few minutes heating it as much as I can prior to lifting it off.
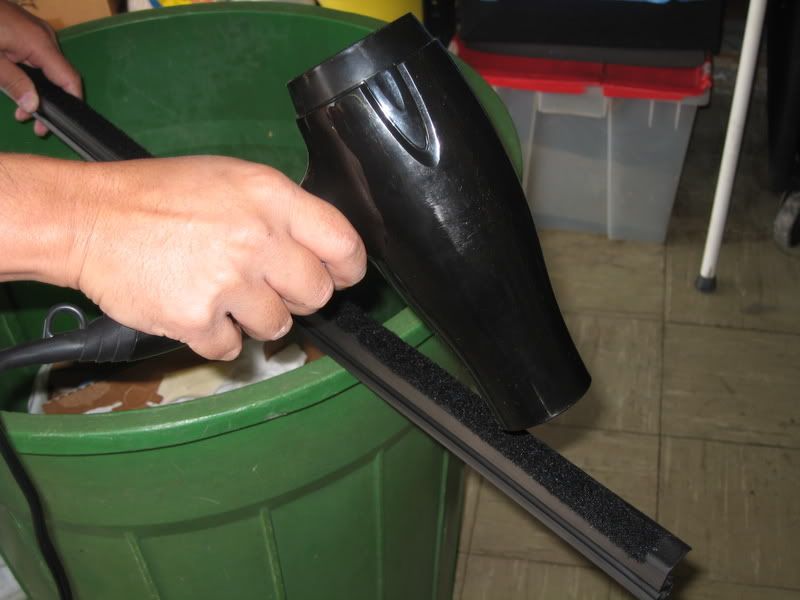
As you can see, it peeled most all the adhesive off with the Velcro.

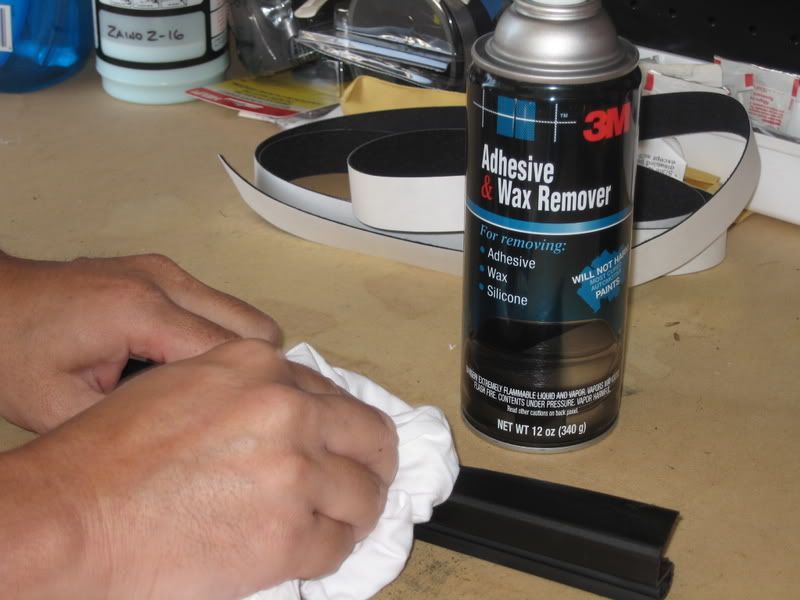
I used some 3M adhesive remover and a clean rag to remove any traces of leftover glue residue off the channel.
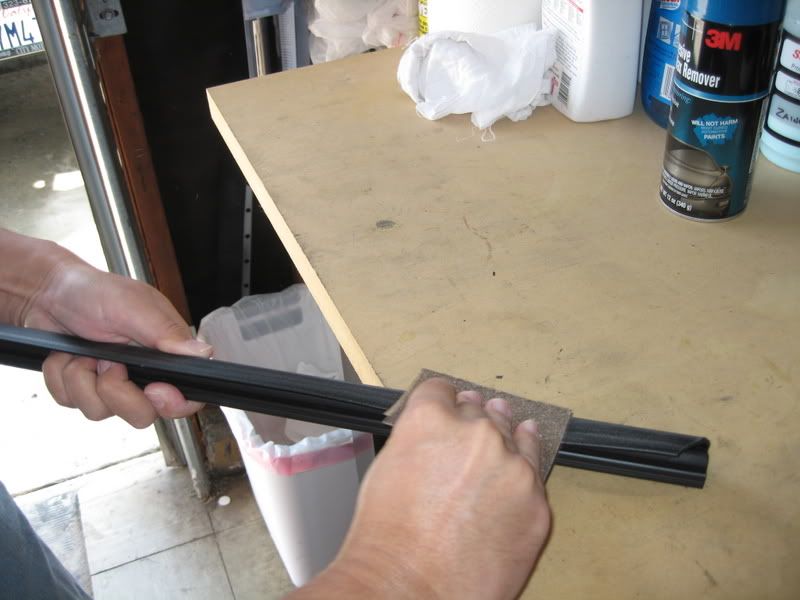
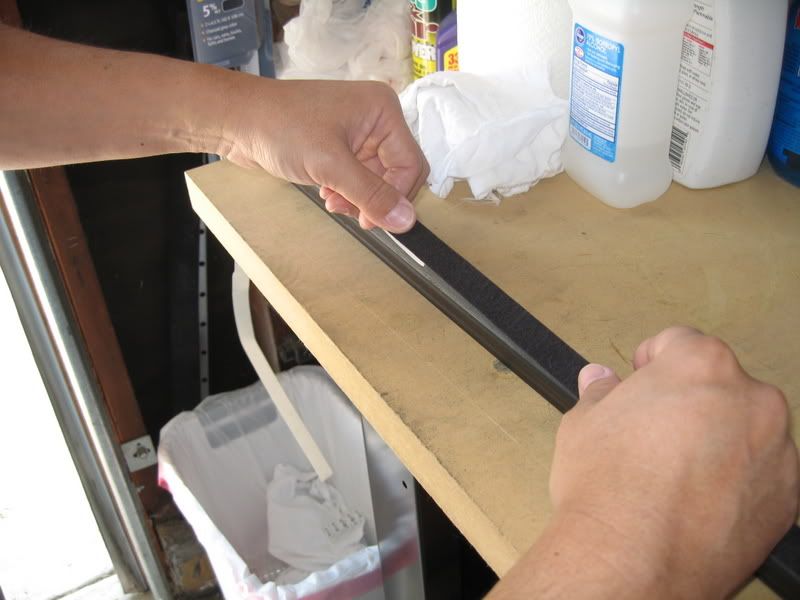
Next, the contact surface on the wiper channel needed to be prepped correctly in order for the Moleskin to positively bond to it. I used 60 grit sandpaper to rough up the entire contact surface area, end to end.


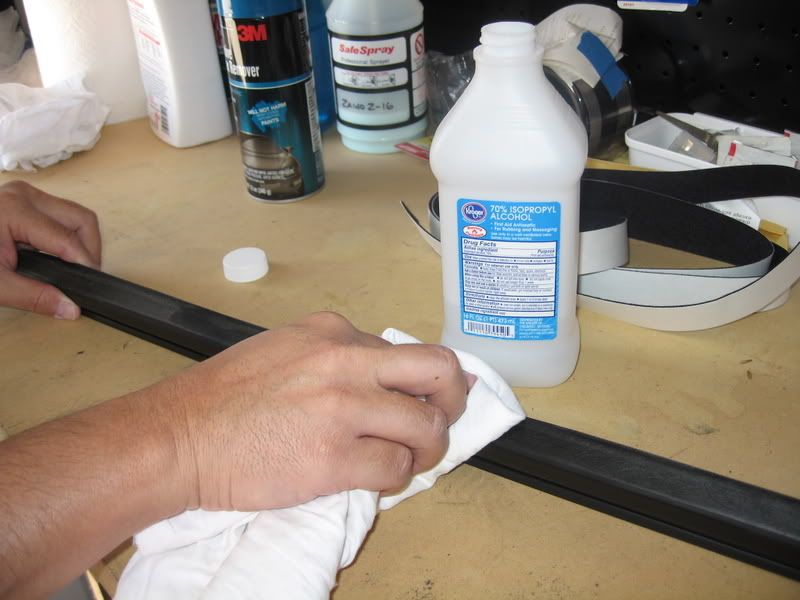
After scuffing the surface, I used some Isopropyl Alcohol and another clean rag to wipe the entire length of the channel, being careful not to touch the wiped surface with my fingers.

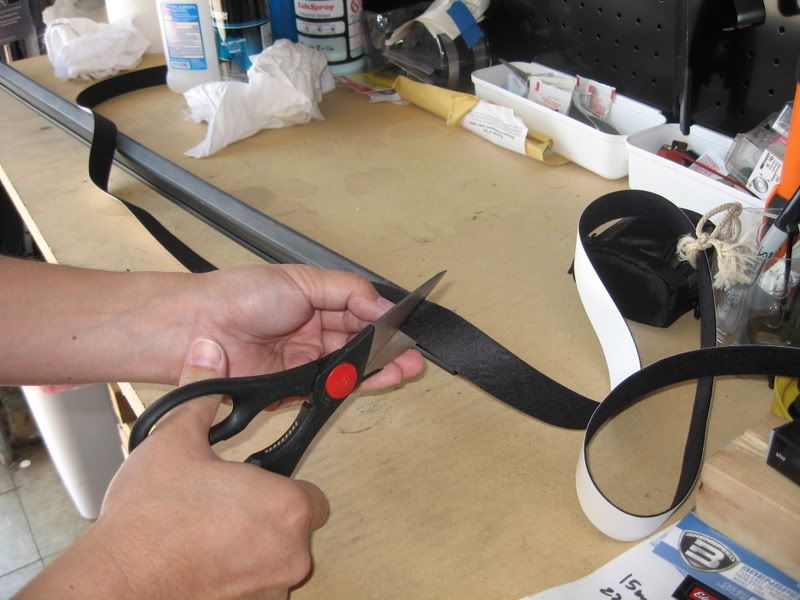
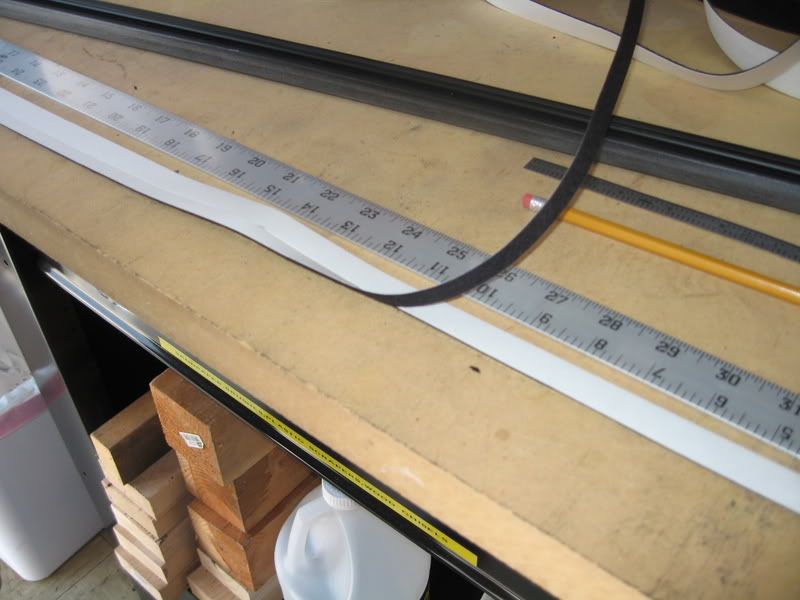
Moleskin layout. The kit enclosed from AutoMoleskin is one long piece, enough to both sides. I laid out the Moleskin strip next to the channel (plus a inch, just incase) and cut it.

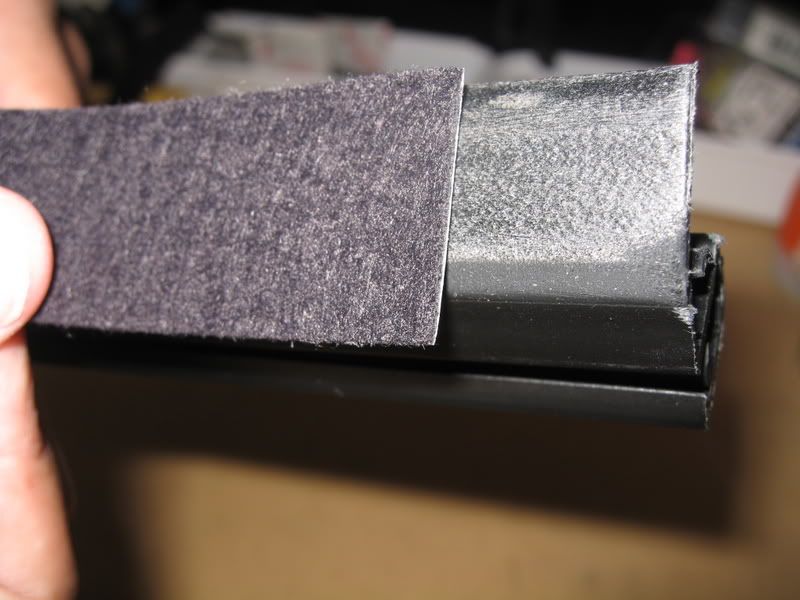
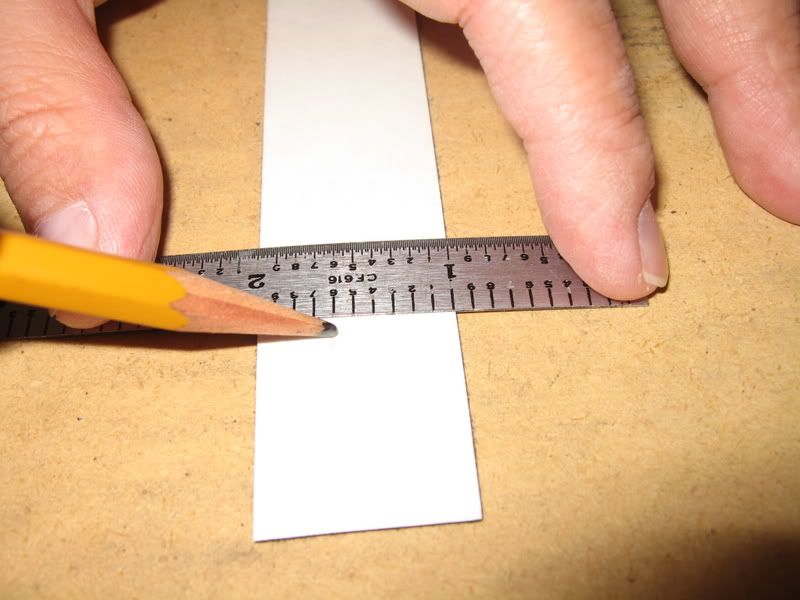
As you can see, the width of the Moleskin is wider than the width of the contact area on the wiper. To minimize any chance for the Moleskin to lift, or for any dirt/debris to work it's way between the felt and channel, I decided to trim the width so it lays perfectly flat on the contact surface (of the wiper). I measured and marked the width at 0.6", and used a razor and a straight edge to trim along the entire length.

Peel back the backing and carefully start at one end making sure that it lays flush along the top edge of the wiper channel.

Once you get to the opposite end (45 degree side), simply trim it to the edge using a razor.
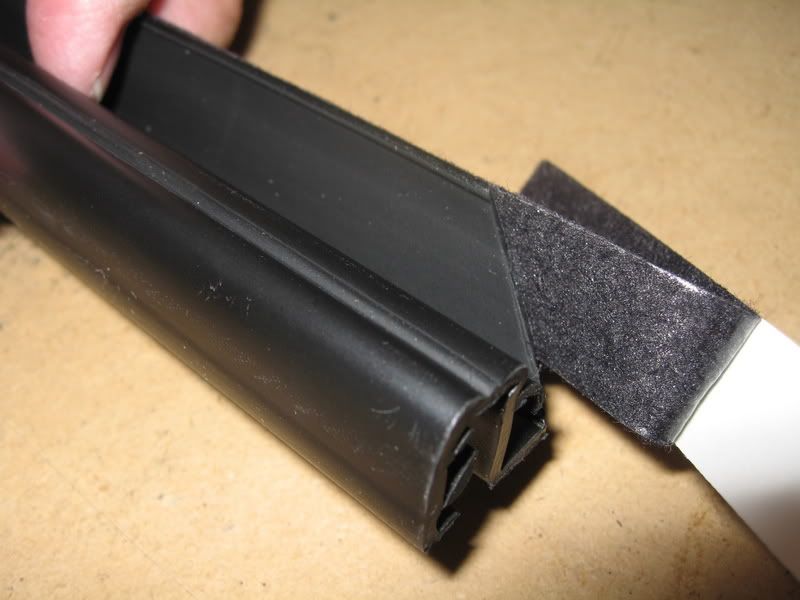
Moleskin felt installed.
_________________________________________
(CONTINUED ON POST 2)
Here's the deal, I've noticed that the Velcro felt has started to separate from its adhesive backing on a small section on the drivers side wiper channel causing the exposed adhesive glue to streak onto the tint when rolled up and down.
My choice was to either replace the Velcro with another strip, or install Moleskin felt in its place. As I have yet to read any negative comments on the use of Moleskin, I opted for the latter.
I obtained a Moleskin kit from Automoleskin.com. Kit comes complete with enough Moleskin to do both sides and a set of install direction.
Here's what I did to replace the Velcro with the Moleskin.
Side by side comparison (Moleskin on left)
Roll the window down and remove the (3) 7mm screws as shown in the pics below (2 on the back side of the door panel and 1 on the top forward side). I did not find it necessary to remove any more screws or trim pieces to access the wiper channel.
Access and remove the wiper channel. Grasp the top edge of the door panel towards the rear and with your fingers, firmly lift it up and over the channel. This step takes a little bit of forcing, so don't be afraid to really pull up on the door panel. Once the channel is accessible, lift up the channel from its end about half way, then slide the rest out.
Here you can see where the Velcro has drooped down, exposing the adhesive glue.
Here is a pic of the orientation of the wiper channel in relation to the track, which it will slide into later.
Velcro felt removal. I was afraid that I was going to have a big mess on my hands after I peeled off the Velcro strip. So, in anticipation of it, I used a blow dryer on the Velcro for a few minutes heating it as much as I can prior to lifting it off.
As you can see, it peeled most all the adhesive off with the Velcro.
I used some 3M adhesive remover and a clean rag to remove any traces of leftover glue residue off the channel.
Next, the contact surface on the wiper channel needed to be prepped correctly in order for the Moleskin to positively bond to it. I used 60 grit sandpaper to rough up the entire contact surface area, end to end.
After scuffing the surface, I used some Isopropyl Alcohol and another clean rag to wipe the entire length of the channel, being careful not to touch the wiped surface with my fingers.
Moleskin layout. The kit enclosed from AutoMoleskin is one long piece, enough to both sides. I laid out the Moleskin strip next to the channel (plus a inch, just incase) and cut it.
As you can see, the width of the Moleskin is wider than the width of the contact area on the wiper. To minimize any chance for the Moleskin to lift, or for any dirt/debris to work it's way between the felt and channel, I decided to trim the width so it lays perfectly flat on the contact surface (of the wiper). I measured and marked the width at 0.6", and used a razor and a straight edge to trim along the entire length.
Peel back the backing and carefully start at one end making sure that it lays flush along the top edge of the wiper channel.
Once you get to the opposite end (45 degree side), simply trim it to the edge using a razor.
Moleskin felt installed.
_________________________________________
(CONTINUED ON POST 2)
Last edited by TacoBill; 3/14/08 at 12:40 PM. Reason: sp
 11/5/06, 09:58 AM
#2
Thread Starter
Moleskin install: Part 2
(CONTINUED FROM POST #1)
_________________________________
Wiper channel re-installation. Make sure you have the channel properly orientated with the 45 degree cut towards the front (door hinge). Position the end of the channel's groove into the metal frame (for me, the one painted Torch Red) and slide the channel all the way in. This operation will take a little bit of force to accomplish. Position your hands anyway you wish to give you the best leverage.


Once you can't push the channel any further into the frame, use a blunt object to push it in the rest of the way.
This shows the final position of the channel installed.
Door panel re-installation. Grasp the top edge of the door panel and pull it over the newly installed wiper channel.


Finishing up. Re-install the 3 door panel screws to complete the installation.
Automoleskin.com recommends not to roll the windows down for at least 12 hours.
Installation complete!
Note (6/9/07):
Sorry, I think there's some confusion with the Velcro felt.
All 05-07's do not come with any type of felt on the window wiper channel.
My tint installer originally put a strip of Velcro felt on the wiper channel to prevent any scratches on my newly tinted windows.
What I (and alot of people, especially those that live in hotter climates) discovered was that the glue on the backside of the velcro was actually seperating, thus smearing the exposed adhesive glue on the wiper channel onto the tint.
This is what I was removing and cleaning prior to the Moleskin installation.
Again, sorry for any confusion. Hope this clears things up.
_________________________________
Wiper channel re-installation. Make sure you have the channel properly orientated with the 45 degree cut towards the front (door hinge). Position the end of the channel's groove into the metal frame (for me, the one painted Torch Red) and slide the channel all the way in. This operation will take a little bit of force to accomplish. Position your hands anyway you wish to give you the best leverage.
Once you can't push the channel any further into the frame, use a blunt object to push it in the rest of the way.
This shows the final position of the channel installed.
Door panel re-installation. Grasp the top edge of the door panel and pull it over the newly installed wiper channel.
Finishing up. Re-install the 3 door panel screws to complete the installation.
Automoleskin.com recommends not to roll the windows down for at least 12 hours.
Installation complete!
Note (6/9/07):
Sorry, I think there's some confusion with the Velcro felt.
All 05-07's do not come with any type of felt on the window wiper channel.
My tint installer originally put a strip of Velcro felt on the wiper channel to prevent any scratches on my newly tinted windows.
What I (and alot of people, especially those that live in hotter climates) discovered was that the glue on the backside of the velcro was actually seperating, thus smearing the exposed adhesive glue on the wiper channel onto the tint.
This is what I was removing and cleaning prior to the Moleskin installation.
Again, sorry for any confusion. Hope this clears things up.
Last edited by TacoBill; 3/14/08 at 12:41 PM. Reason: sp
 11/5/06, 04:28 PM
#5
Thread Starter


 11/6/06, 09:41 PM
#9
Cobra R Member
Join Date: August 23, 2004
Posts: 1,945
Likes: 0
Received 0 Likes
on
0 Posts
What about the rest of the screws that had to be removed? Like in the bottom and the two hidden behind the door handle? I had to take them all out. My screws wer hex head and not at all like yours.
11/7/06, 07:44 AM
#10
Thread Starter
From past experience, I found that the wiper channel can be accessed by only removing the 3 screws I noted. It's a bit more hard on the fingers when prying the panel up and over the frame, but wasn't too bad.
11/10/06, 10:18 PM
#11
Bullitt Member

Join Date: June 7, 2006
Location: Florida
Posts: 498
Likes: 0
Received 0 Likes
on
0 Posts
Bill,
Great job and write up as usual. One question though, instead of cutting down the width of the moleskin, why not just wrap the excess width around the top side of the channel? I think this would ensure it sticks even better, and have less of a chance of the adhesive ever being exposed on the top edge. Does that sound feasible? I need to do this, as my tint is already scratched, and the installer is going to replace it for free, but I will install the moleskin first this time. I already have it, but the installer said it wasn't necessary, but alas they were wrong.
Great job and write up as usual.
One question though, instead of cutting down the width of the moleskin, why not just wrap the excess width around the top side of the channel? I think this would ensure it sticks even better, and have less of a chance of the adhesive ever being exposed on the top edge. Does that sound feasible? I need to do this, as my tint is already scratched, and the installer is going to replace it for free, but I will install the moleskin first this time. I already have it, but the installer said it wasn't necessary, but alas they were wrong.
11/11/06, 12:38 AM
#12
Thread Starter
Take a look at any of the close-up pics again, there's a 'lip' that runs along the top backside the whole length. The Moleskin will have a difficult time forming around that lip and stay stuck to that opposite side. It'll eventually begin to lift, exposing it to air and dirt.
I know you're concerned about the Moleskin sliding down and the adhesive smearing on the tint. But, from what I see, the adhesive used on the back of the Moleskin is nothing like the adhesive used on the Velcro. What's on the Moleskin looks like an ultra-thin 3M Hi-Performance type of double-side tape, like this (what I used on my mirror inserts)...

The adhesive used on the Velcro actually looks like thick glue (in comparision) that was thermally applied... big difference.
I have yet to read one complaint of the Moleskin sliding down from the wiper channel. Remember, how well it sticks depends on how well you prep the surface.
11/17/06, 01:44 PM
#14
GREAT post, I just ordered the moleskin kit from AutoMoleskin and will be referencing this for my install!
I hope this 3M adhesive holds up to the Phoenix heat better than the stuff from Duro-Felt does (have re-applied 2x already)
I hope this 3M adhesive holds up to the Phoenix heat better than the stuff from Duro-Felt does (have re-applied 2x already)
1/13/07, 02:58 PM
#20
Going to FINALLY do the install on this later tonight after I'm done wash/wax/polishing 
My moleskin kit has been sitting on my desk for at least a month and a half
Thanks for the great, detailed write-up on this, Bill!
My moleskin kit has been sitting on my desk for at least a month and a half
Thanks for the great, detailed write-up on this, Bill!