Wheel Spacer Install (How-to & pics inside)
 9/6/08, 12:34 AM
#1
Legacy TMS Member
Thread Starter
Join Date: May 24, 2006
Location: San Diego
Posts: 7,409
Likes: 0
Received 0 Likes
on
0 Posts
Wheel Spacer Install (How-to & pics inside)
First let me start off with a little Spacer 101.
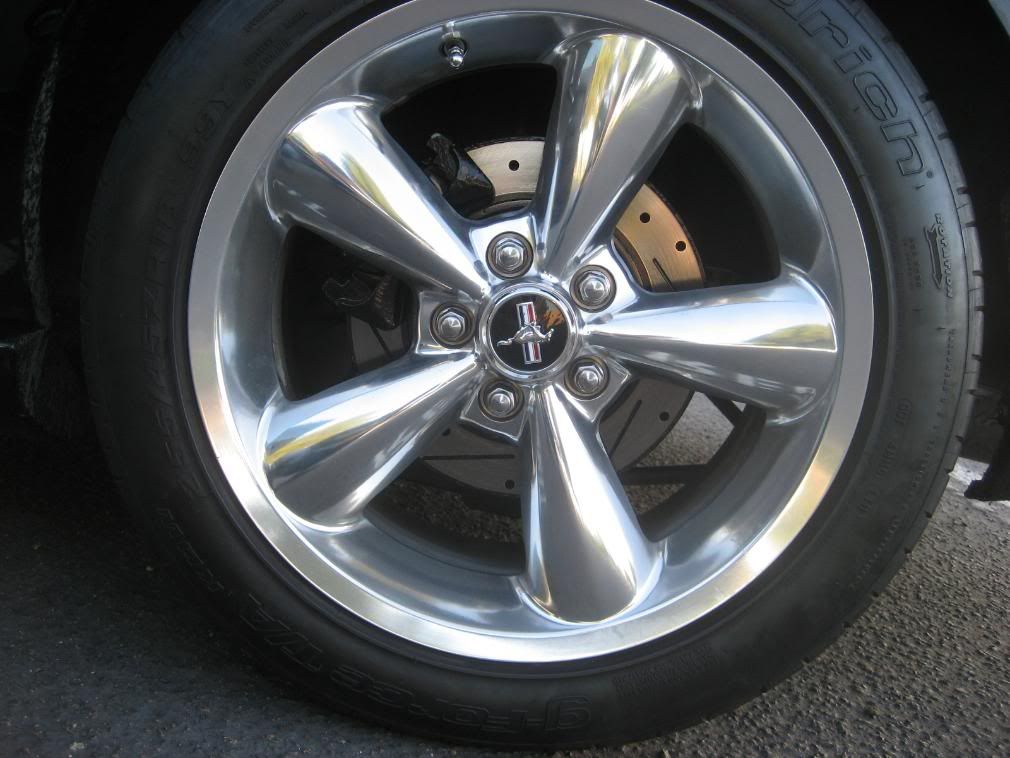
There's two different types of wheel spacers lugcentric and hubcentric. Lugcentric spacers are flat on both sides of the spacer and depend on the studs for for centering. Hubcentric spacers have grooved area on the backside that allows them to sit on the hub as if it where the rim then as a hub on the front side to allow the wheel to sit as if it where on the stock hub. Both of those variations are offered in "adapter style" (Meaning you install the spacer on the stock studs and the wheels on the studs pressed into the spacer.) Then there's just a normal spacer where your required to replace the stock studs with longer ones. From my research I've seen that the more favored/safer option are the hubcentric variants that also provide longer replacement studs.
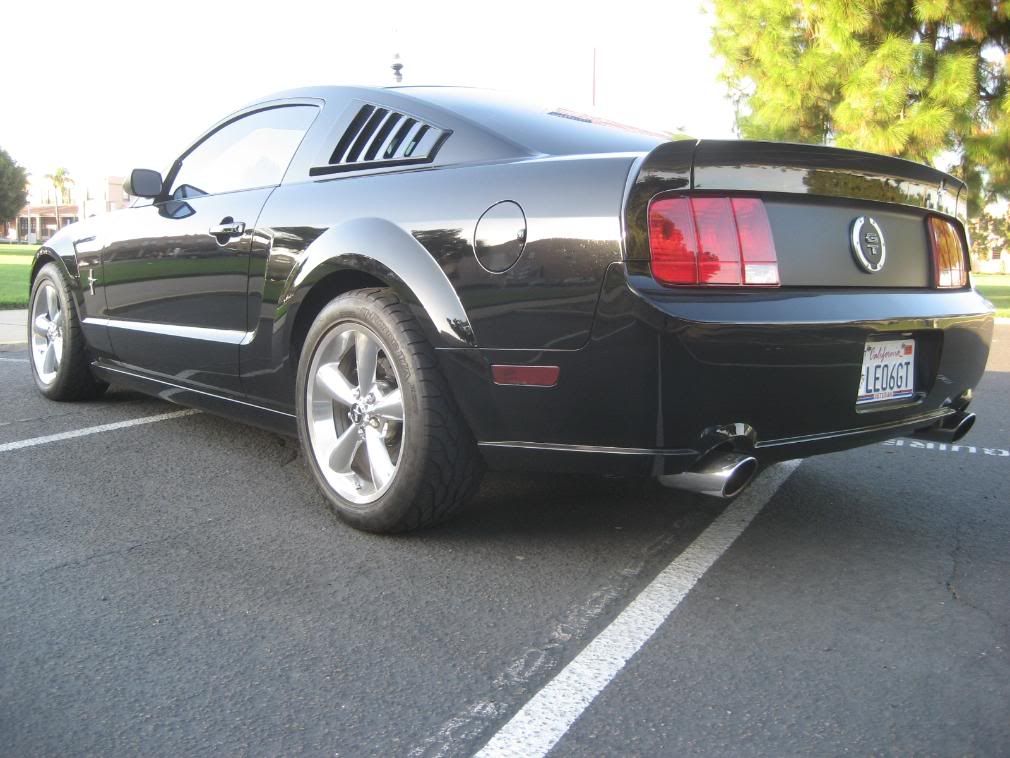
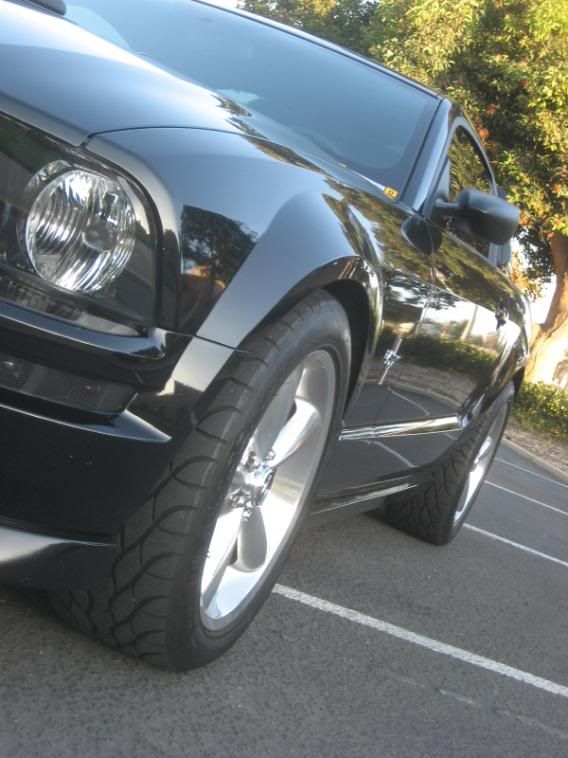
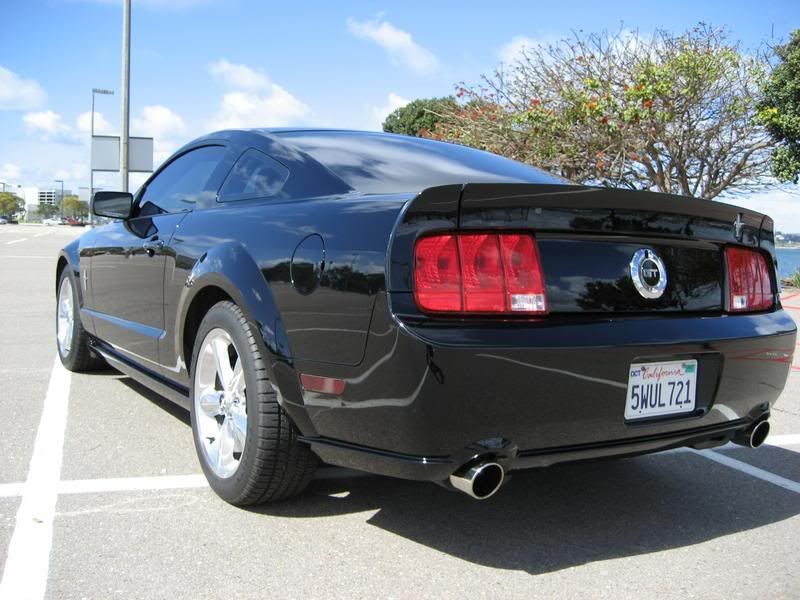
The purpose of spacers vary from purely cosmetic purposes to performance purposes. Some people get spacers in order to accomadate bigger brake kits while using the rim of their choice. Additionally using spacers gives the car a wider track and helps with cornering. Others like myself do it to get rid of that sunken in look the stock wheels have. I really like the stock bullits so this was the only way to get the look I want and keep the bullits.
The biggest myth about spacers is that they're unsafe. If you use the proper spacer application for your setup you will not have problems. The only mishaps I found while looking online were from people that ran spacers like the one's in pic 3 without getting longer studs. From my understanding if your going to keep your stock studs and not use an adapter style spacer like in pic 1 your the biggest spacer you can run is a 1/4. If you go any bigger your supposed run an adapter type spacer or get longer studs.
I previously had some lugcentric spacer I got off ebay. While I didn't have any problems with them I decided to play it safe and get the more favored option. My main reason for getting these though is that now when I go to the track instead of having to unbolt all the spacers before installing my track tires I can just slide the spacers off and on. With the old spacers it was like having to switch eight tires.
I chose to buy mine from "MustangWheelSpacers". I heard about them in another forum and people seemed to be happy and trouble free running their spacers. Plus I liked the fact they provide you with the stud removal and stud install tool. Customer service was also top notch. I called them a few times to ask some tech questions and they were really helpful.
Here's some pics I found online of both types of spacers.
Hubcentric (Keeps your stock studs)

Lugcentric (Keeps stock studs) These are the like my old spacers.

Hubcentric (Replace stock studs) This is the set I bought.

Backend of a hubcentric spacer. Lugcentic spacers don't have that indentation.

With out further ado......
TOOLS NEEDED
Jack
Jack stands
Lug nut wrench
15MM socket
19MM socket
27MM socket
�” socket wrench
�” breaker bar
Stud removal tool (Included in spacer kit)
Stud install tool (Included in spacer kit)
*****MAKE SURE THAT ONCE YOU REMOVE THE CALIPERS FROM THE ROTOR YOU DO NOT PRESS THE BRAKES. IF YOU DO THIS YOU WILL NEED TO MAKE A TRIP TO YOUR LOCAL AUTOZONE AND RENT A BRAKE PISTON COMPRESSING TOOL. YOU WILL NOT BE ABLE TO COMPRESS THE REAR PISTONS WITH A C-CLAMP. DON’T ASK ME HOW I KNOW.*****
Rear Wheel Spacer Install
STEP 1
Jack up rear of the car and remove wheels.
STEP 2
Remove caliper bolts with 15mm socket.

STEP 3
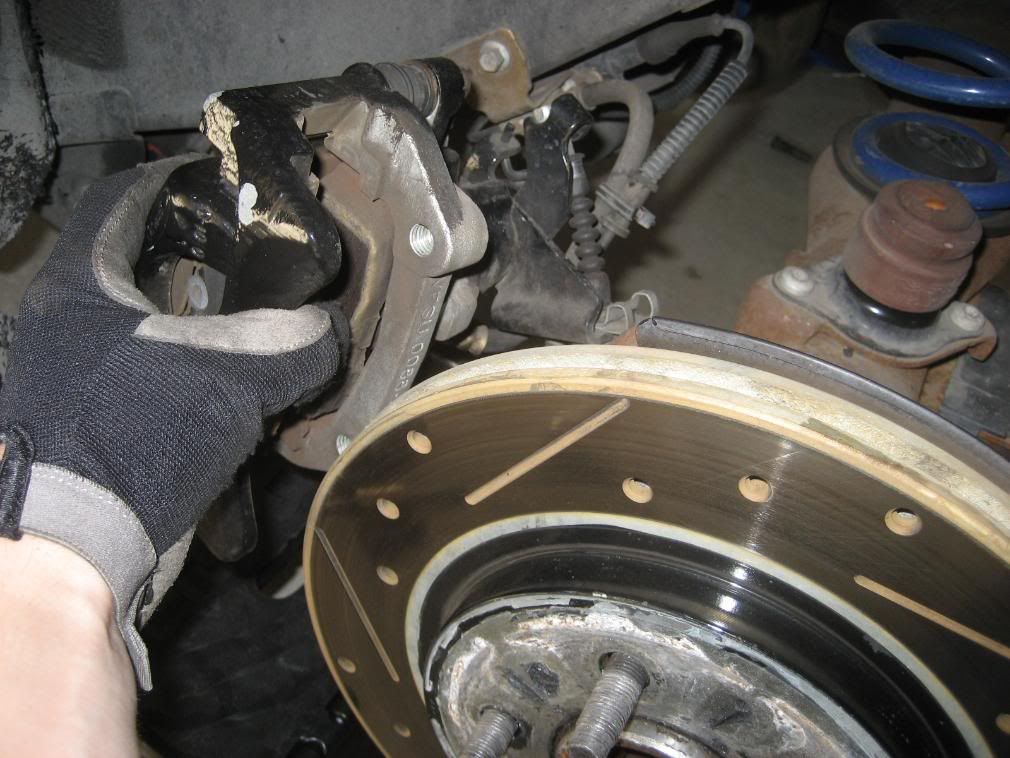
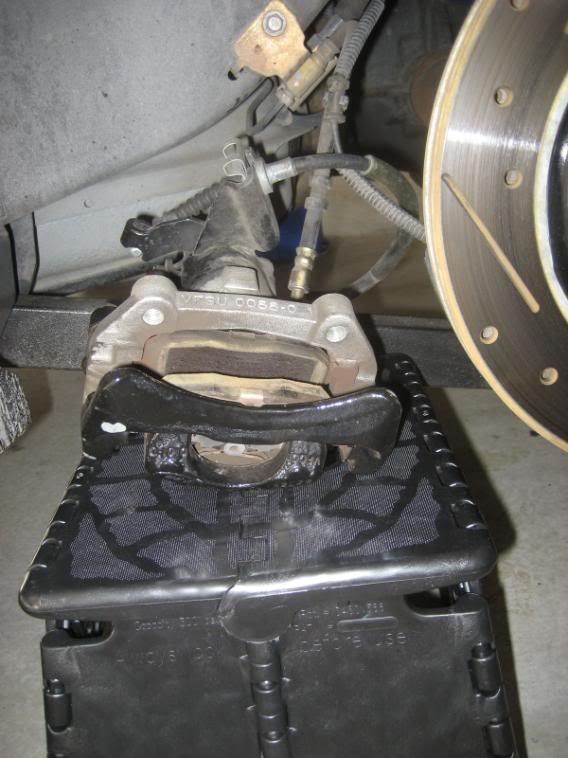
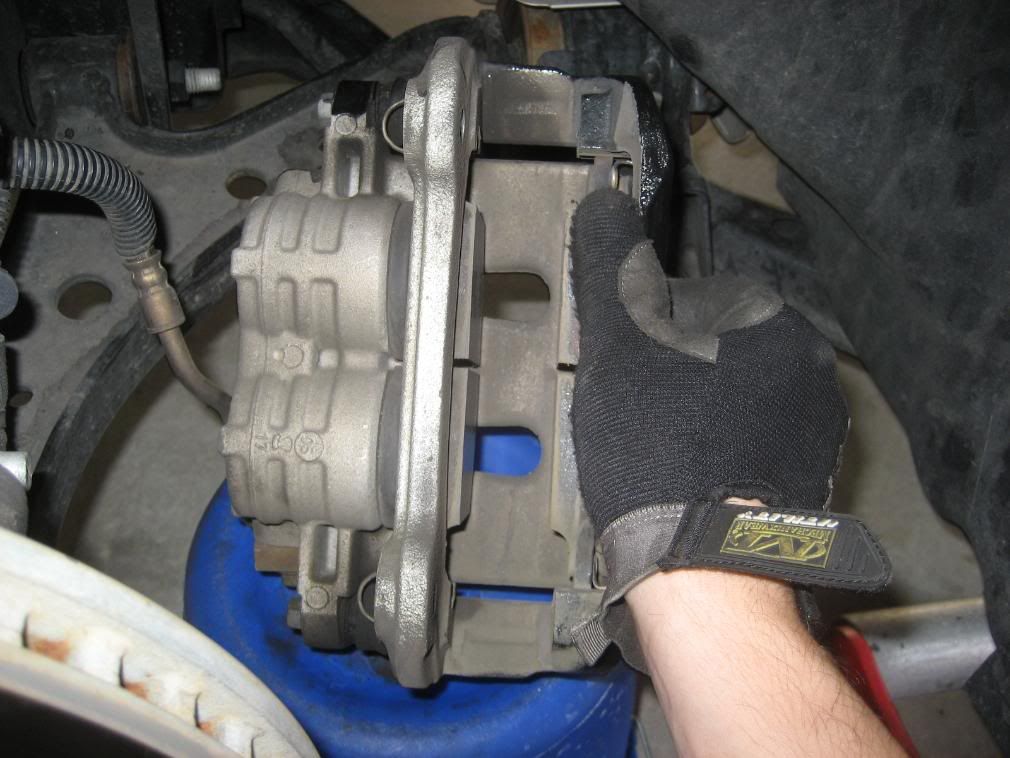
Remove Caliper. Have something to support it standing by.
STEP 4
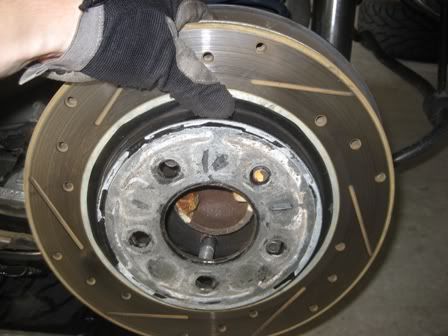
Remove rotor. (Note: Iif this is your first time removing the calipers you will have remove a couple of clips around the studs using a pair of dikes. If rotor stuck or frozen use a hammer to shock the hat area between studs.)
STEP 5
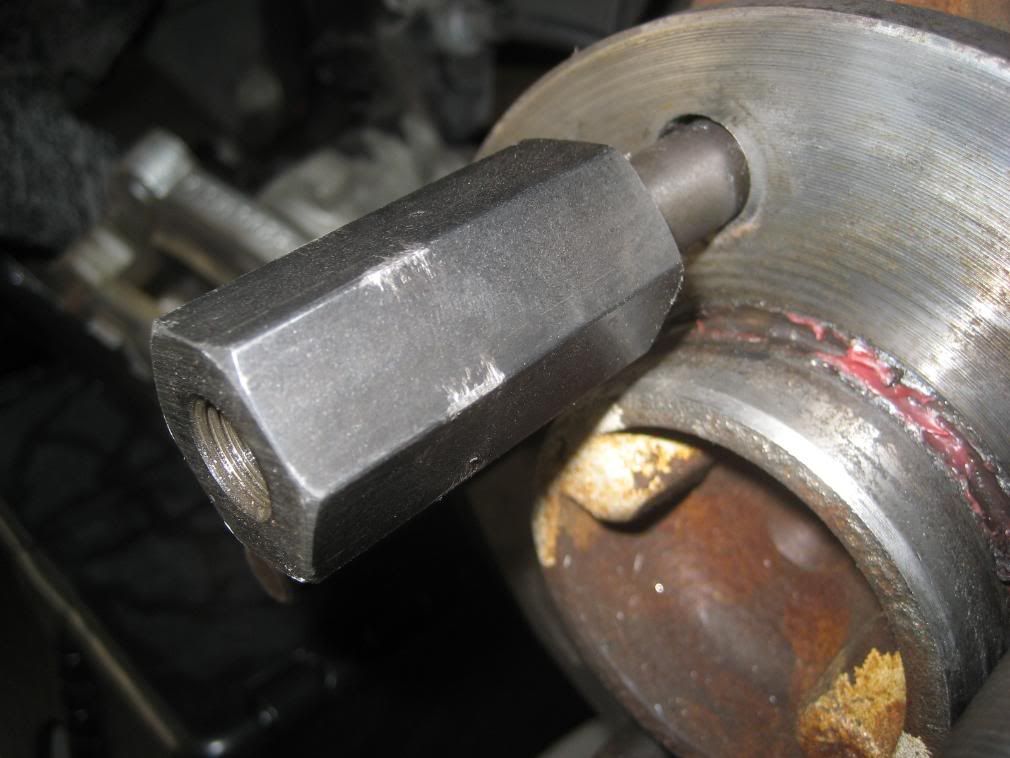
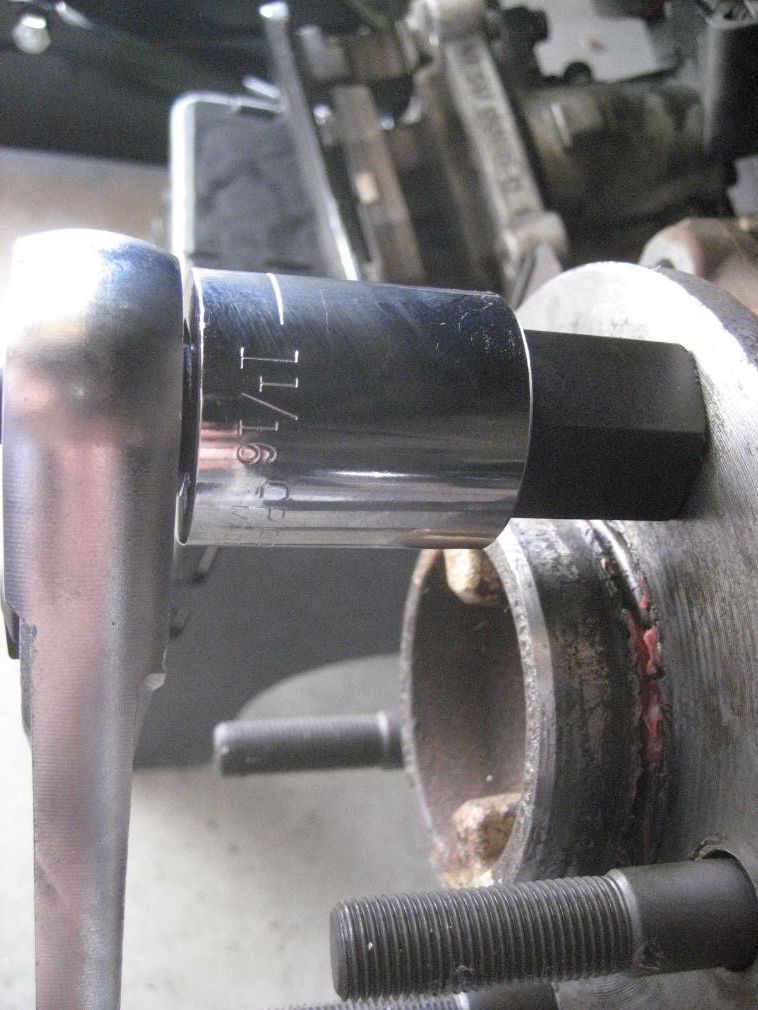
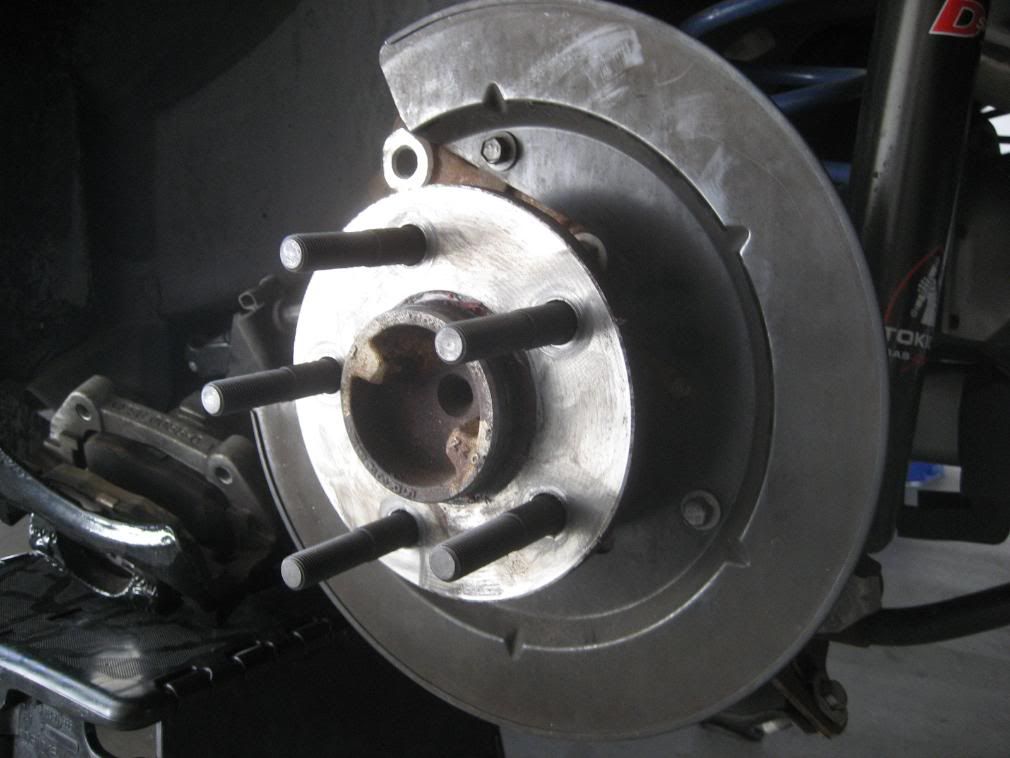
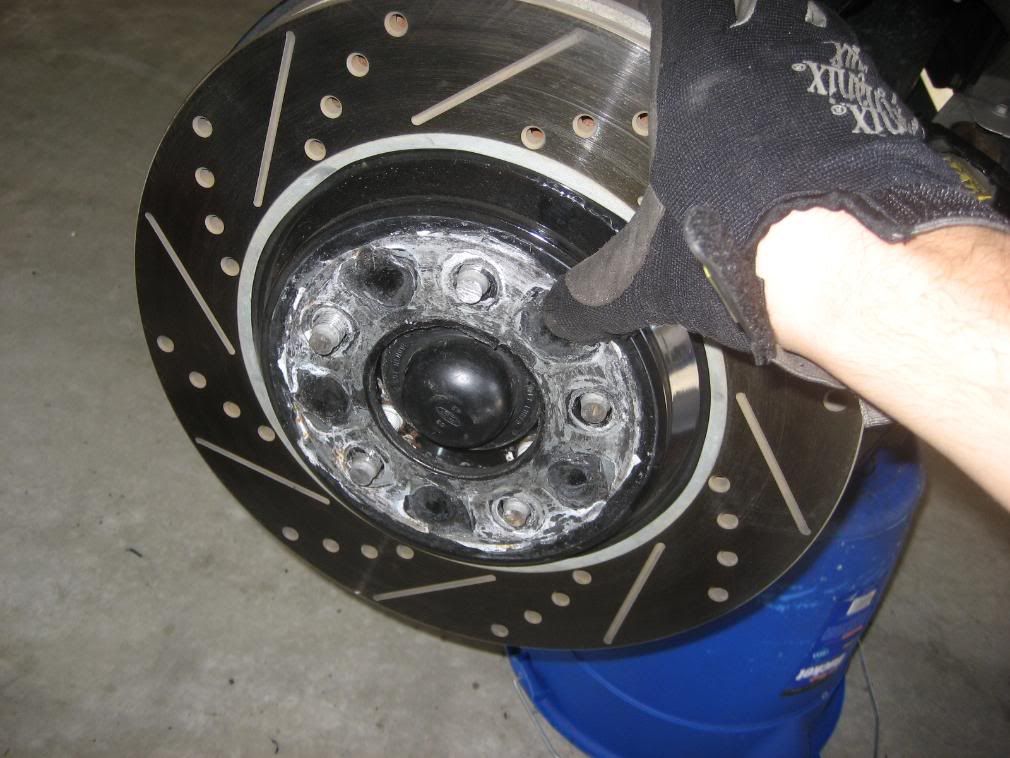
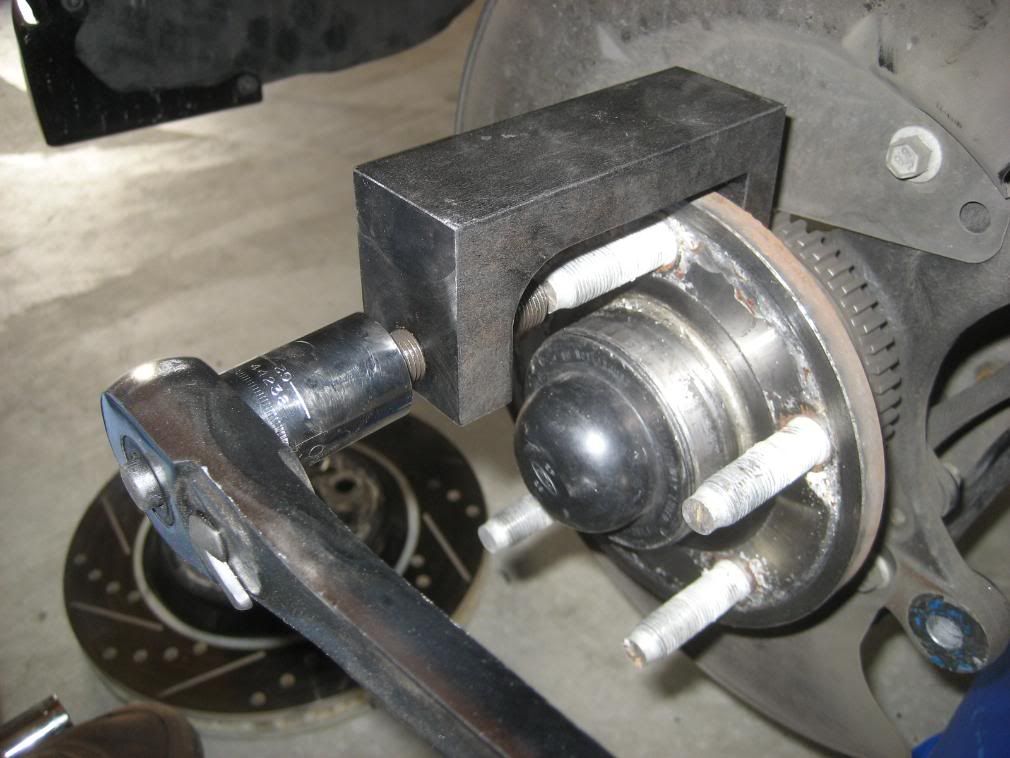
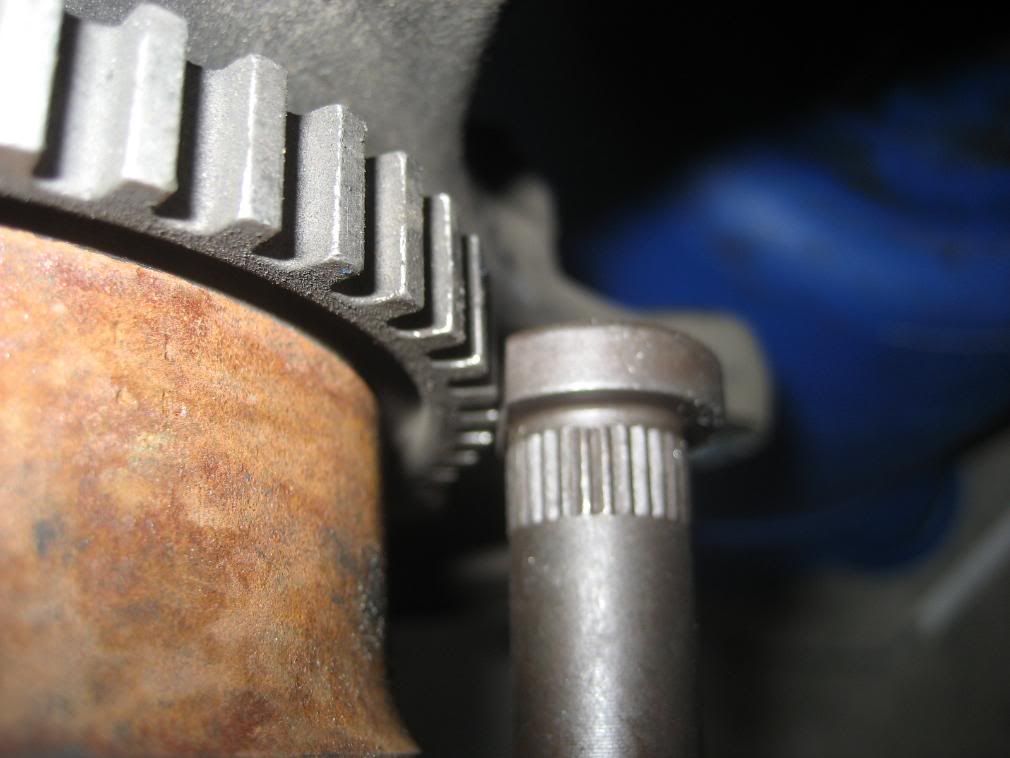
Using stud removal tool remove all 5 studs.
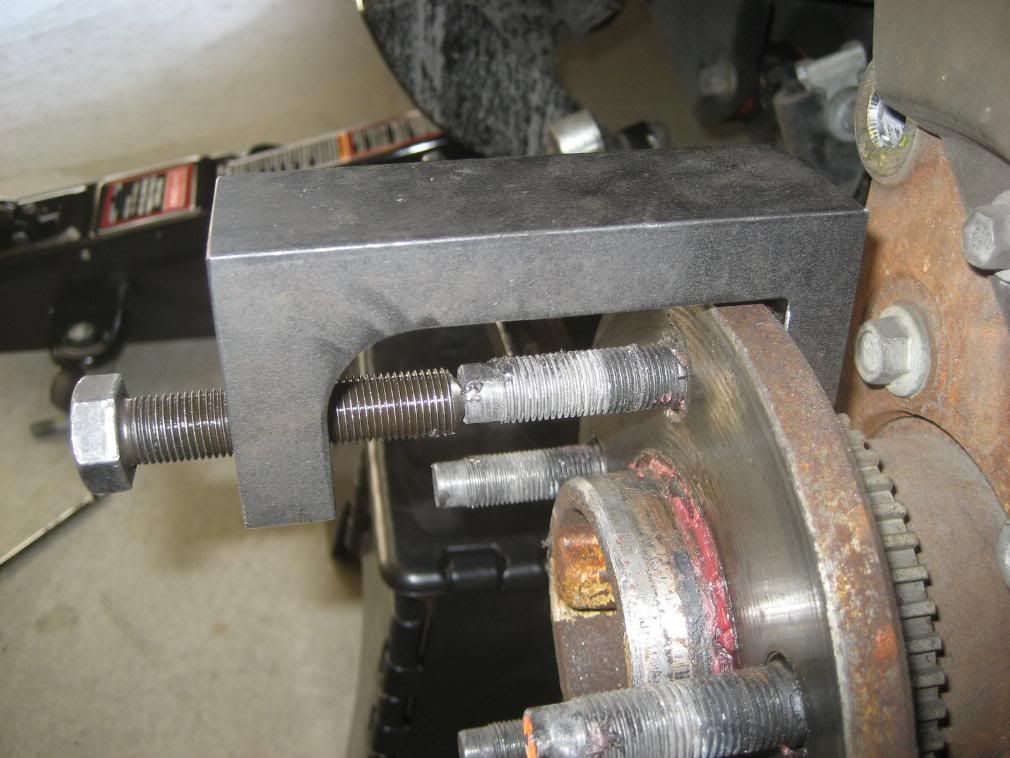
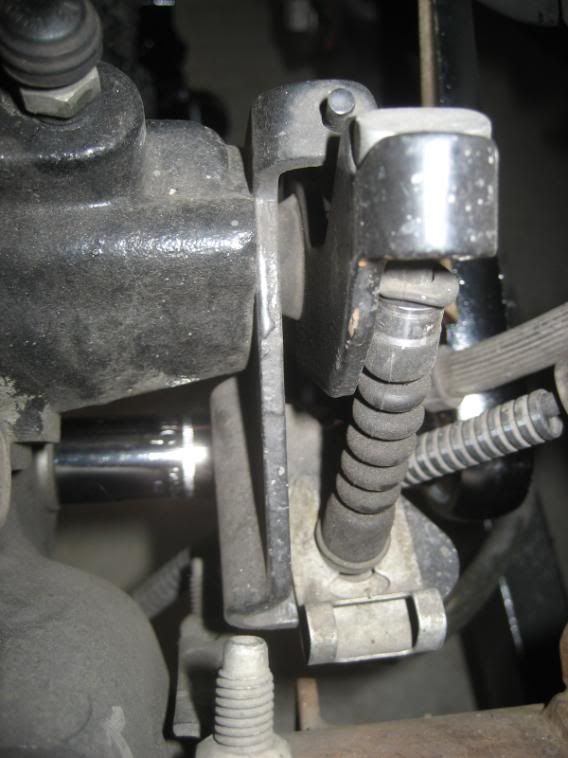
Note: In order to remove studs they will need to be pushed out through this hole located on the back of the hub. Picture below.
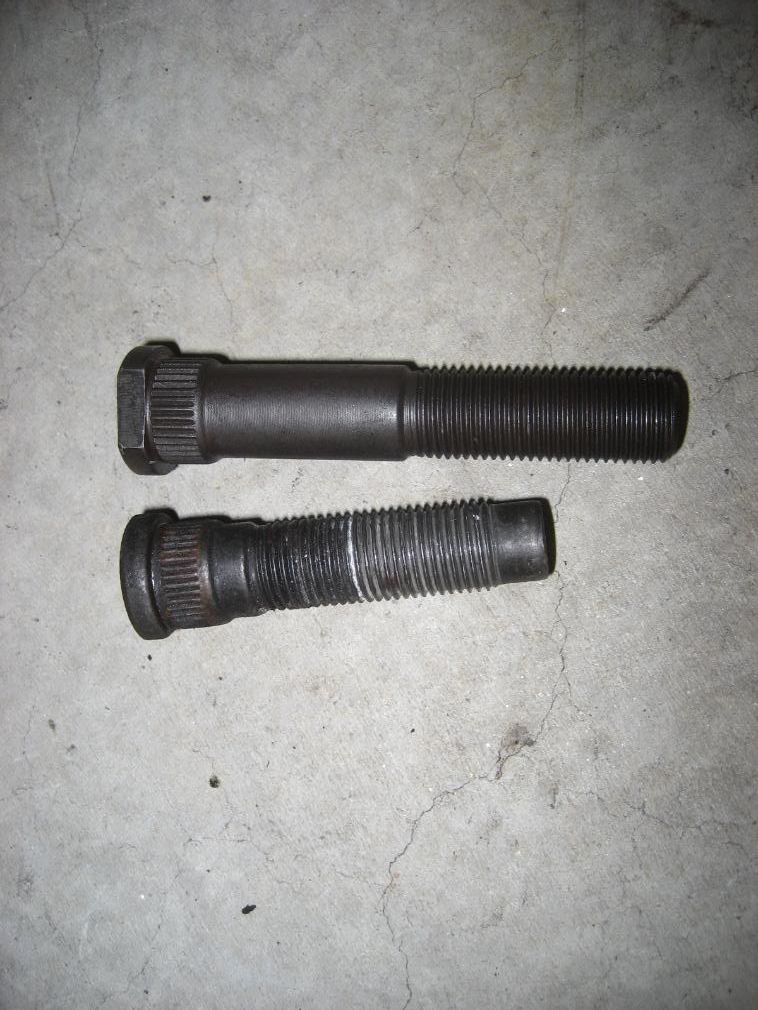
Comparison shot of stock studs and new studs.
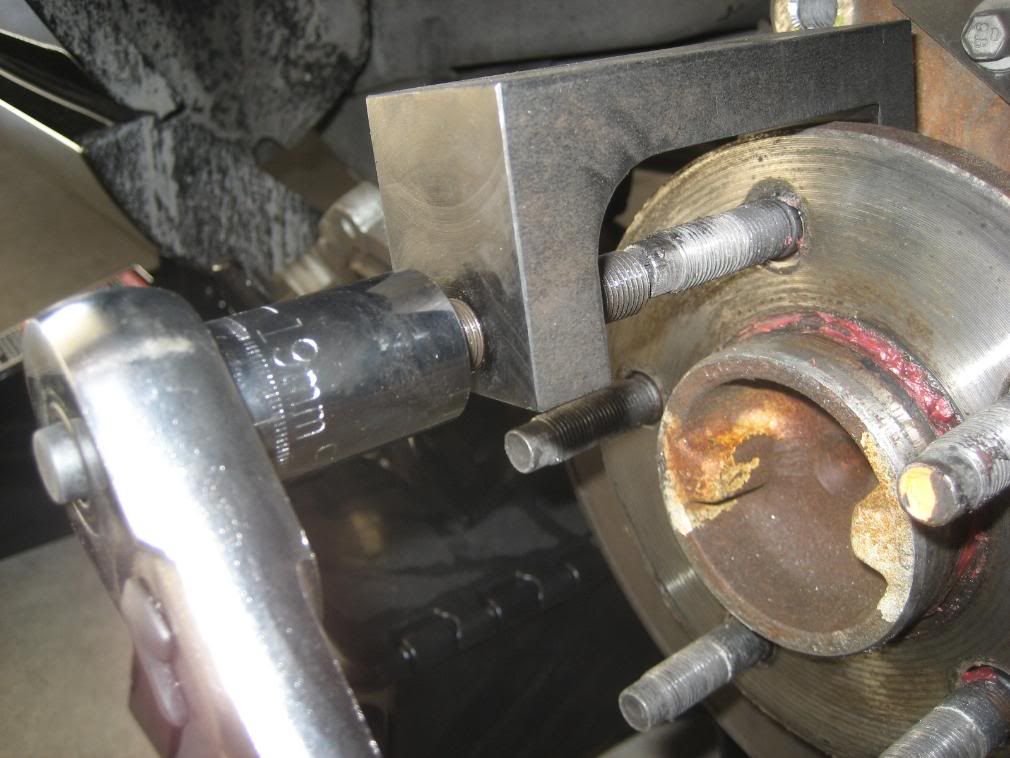
STEP 6
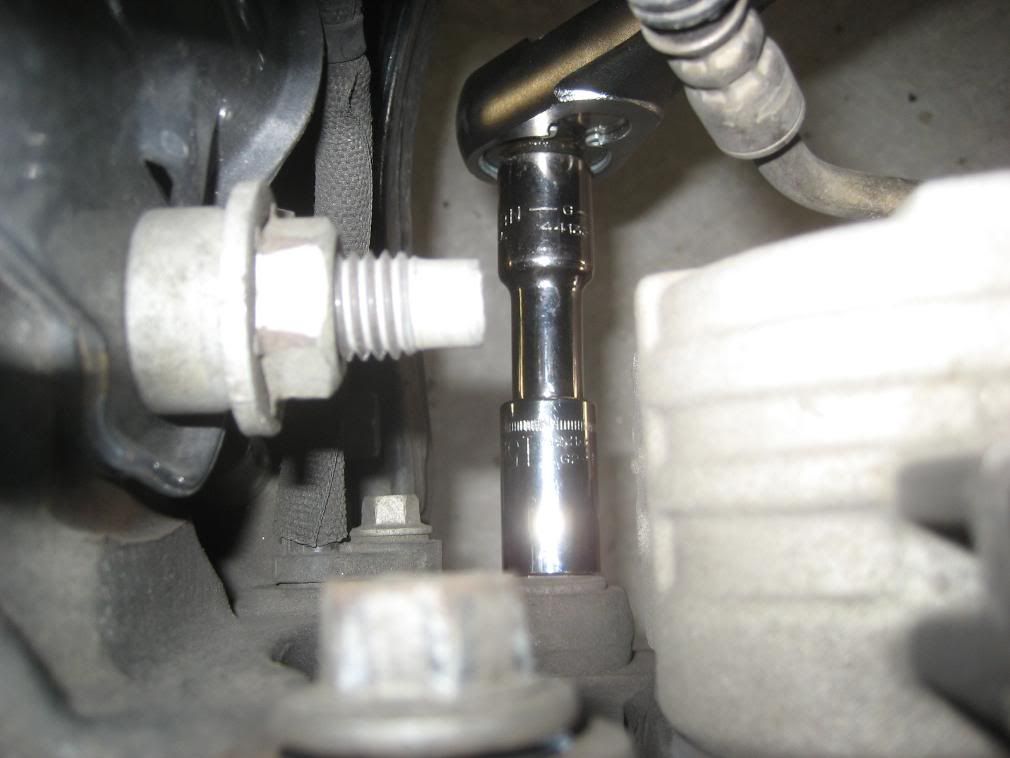
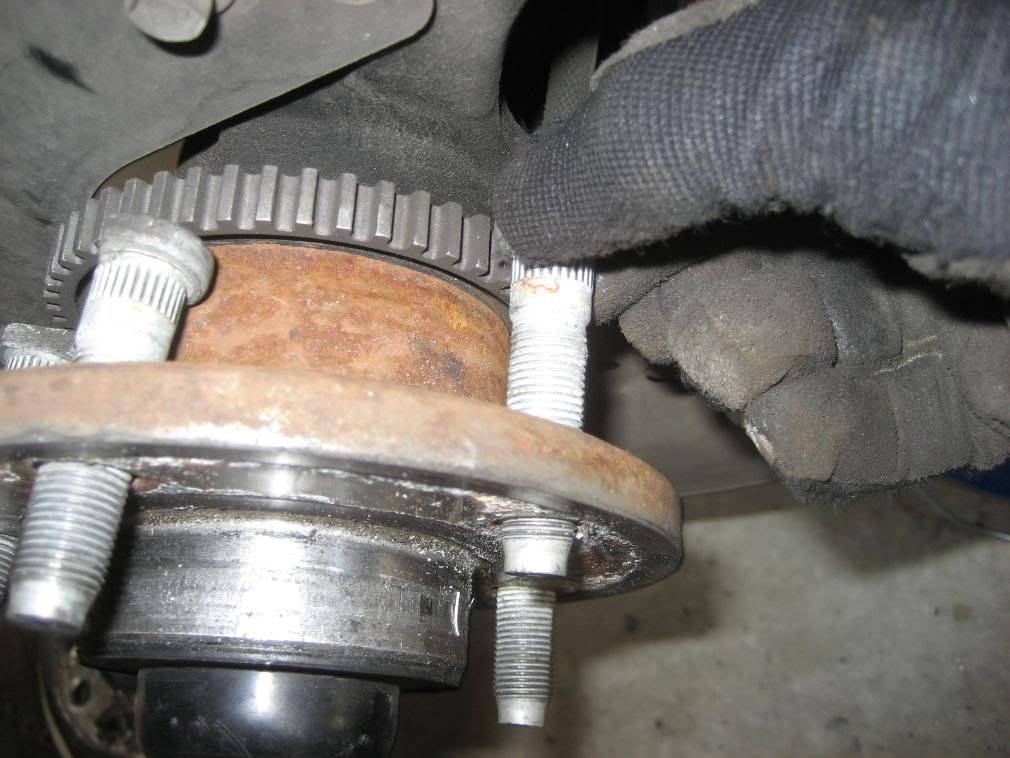
Insert new studs through same hole that you used to remove the stock ones. Get them all in before you start drawing them in. Using the stud install tool draw the studs in one at a time. You will know when the studs are seated when they’re flush with the back of the hub and you are no longer be able to turn the socket wrench.
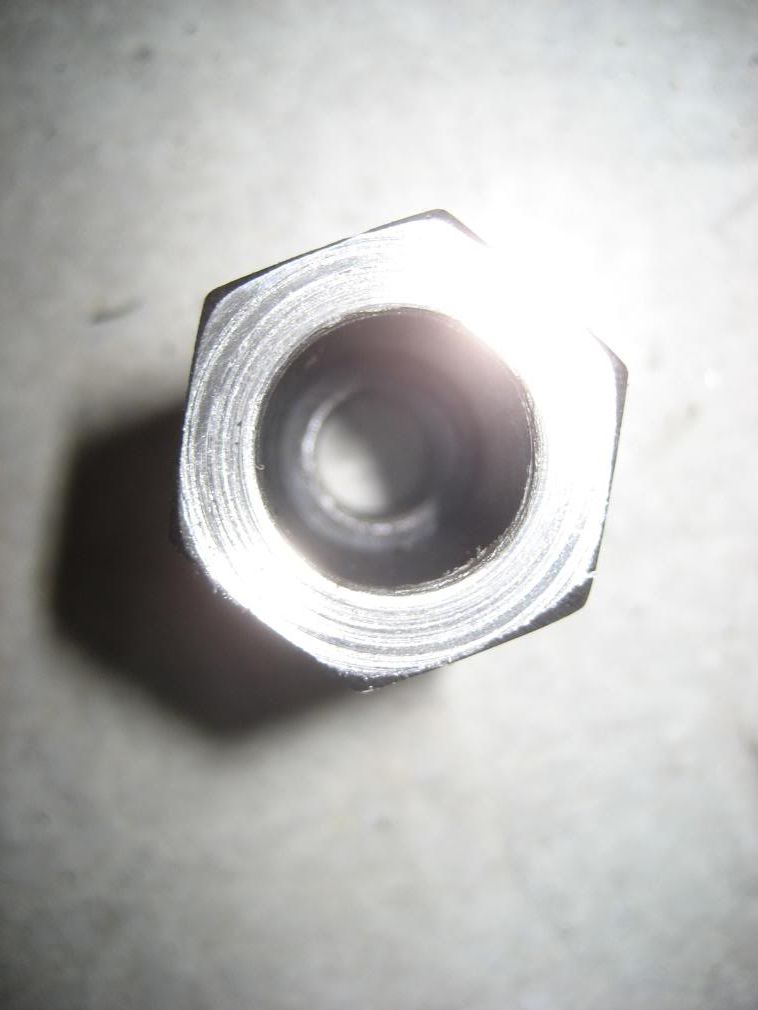
Note: Stud install tool must go on new stud with the non threaded part first. Picture showing non threaded side below.
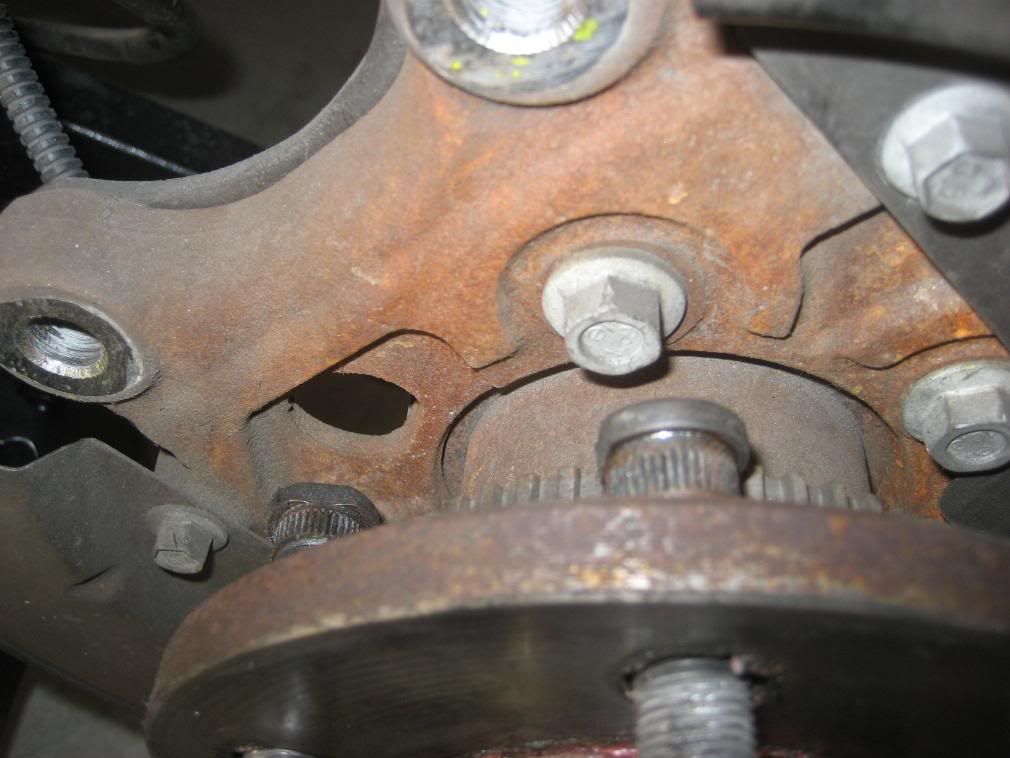
STEP 7
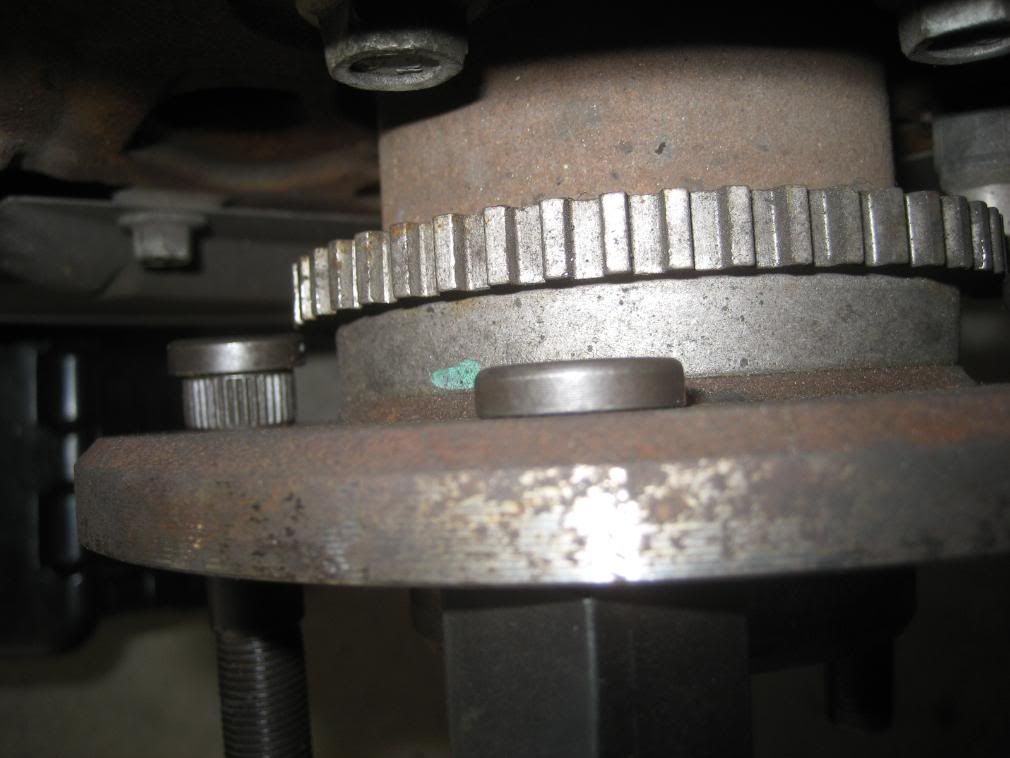
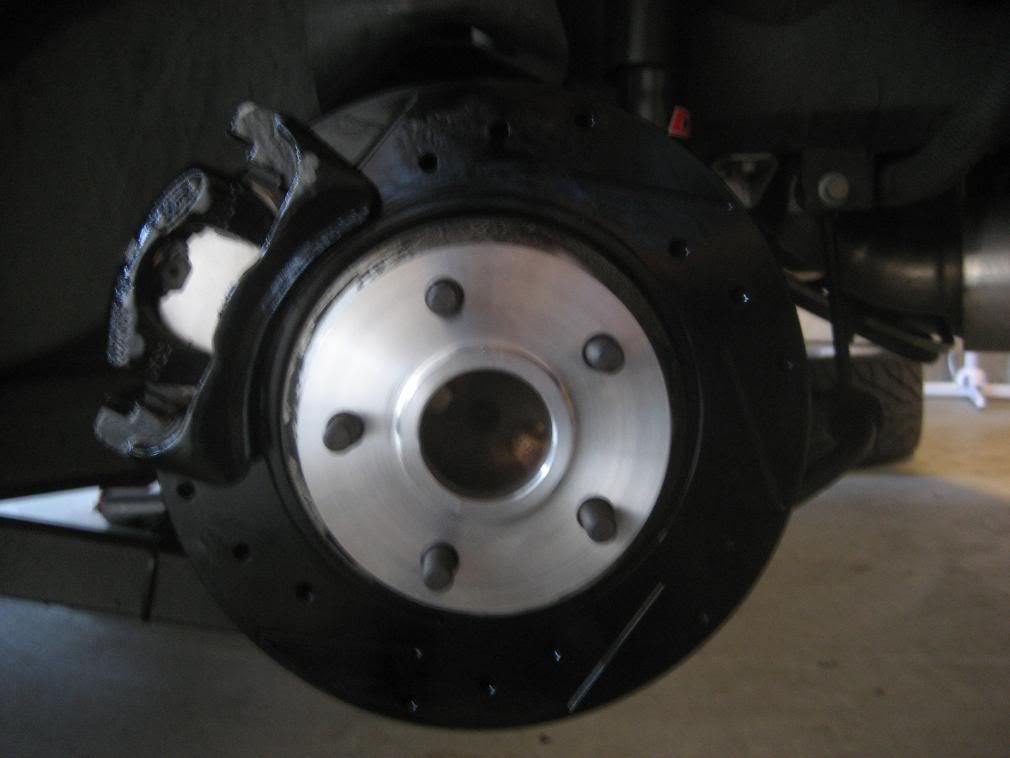
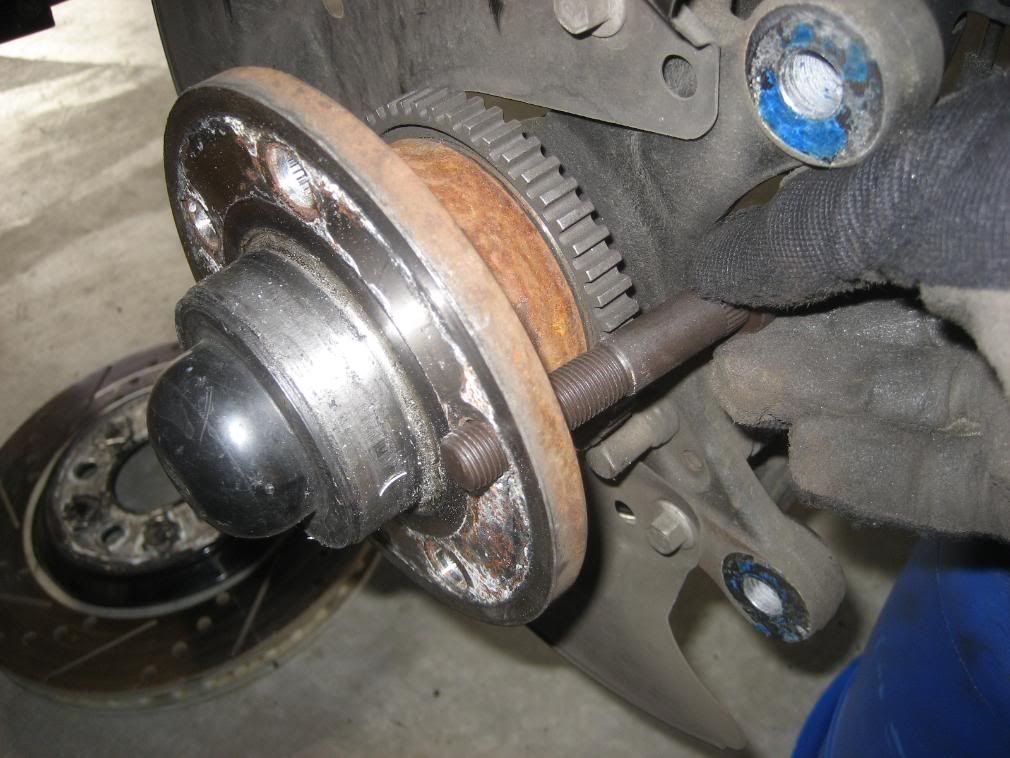
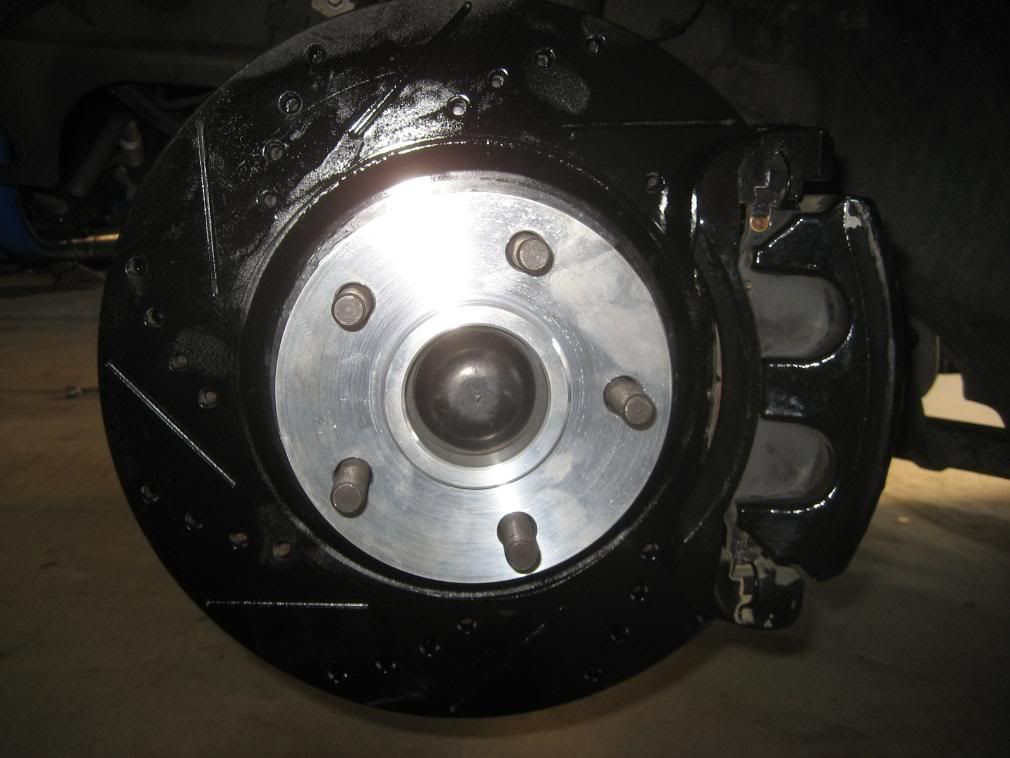
Once all studs are installed and flush like the stud on the right in the pic below reinstall caliper then install spacer. After that put your wheel back on and repeat steps 1-7 on opposite side. Rear spacer install is now complete.
Front Wheel Spacer Install
STEP 1
Jack up front side the of the car and remove wheel.
STEP 2
Remove caliper bolts with 15mm socket.

STEP 3
Remove Caliper. Have something to support it standing by.
STEP 4
Remove rotor. (Note: Iif this is your first time removing the calipers you will have remove a couple of clips around the studs using a pair of dikes. If rotor stuck or frozen use a hammer to shock the hat area between studs.)
STEP 5
Using stud removal tool remove all 5 studs.
STEP 6
Insert new studs through same hole that you used to remove the stock ones. Get them all in before you start drawing them in. Using the stud install tool draw the studs in one at a time. You will know when the studs are seated when they’re flush with the back of the hub and you are no longer be able to turn the socket wrench.

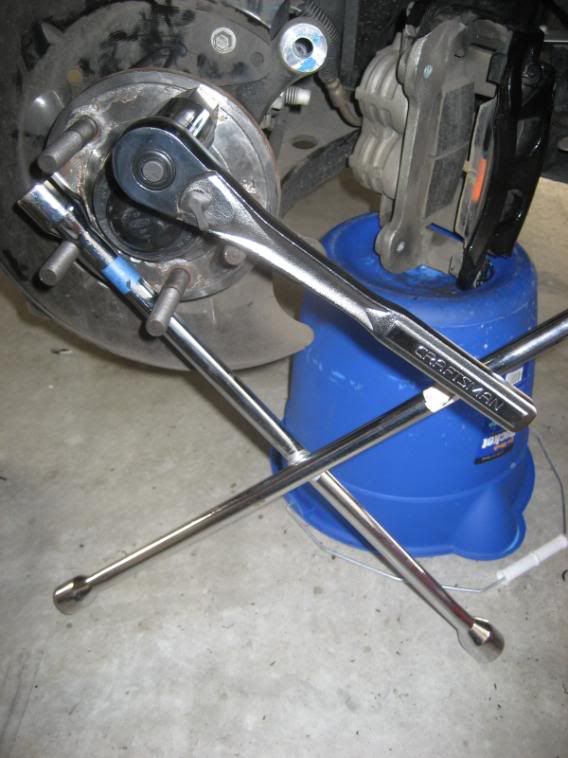
Note: The front wheel studs can only be installed with the straight edge side of the stud facing in the direction of the pic below.
In order to fully tighten the studs you will need a friend to help keep the hub from spinning. If you’re a one man show like myself you can use a tire iron as show below.
STEP 7
Once all studs are installed and flush like the stud on the right in the pic below reinstall caliper then install spacer. After that put your wheel back on and repeat steps 1-7 on opposite side. Front spacer install is now complete.
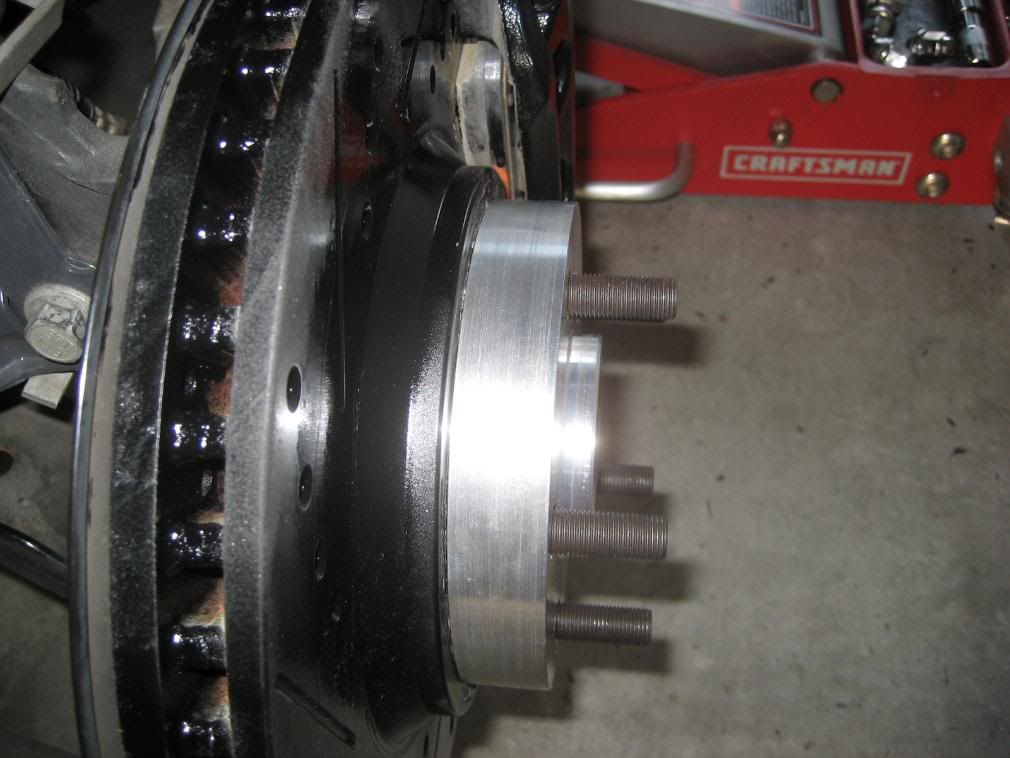
Finished!!!!!


There's two different types of wheel spacers lugcentric and hubcentric. Lugcentric spacers are flat on both sides of the spacer and depend on the studs for for centering. Hubcentric spacers have grooved area on the backside that allows them to sit on the hub as if it where the rim then as a hub on the front side to allow the wheel to sit as if it where on the stock hub. Both of those variations are offered in "adapter style" (Meaning you install the spacer on the stock studs and the wheels on the studs pressed into the spacer.) Then there's just a normal spacer where your required to replace the stock studs with longer ones. From my research I've seen that the more favored/safer option are the hubcentric variants that also provide longer replacement studs.
The purpose of spacers vary from purely cosmetic purposes to performance purposes. Some people get spacers in order to accomadate bigger brake kits while using the rim of their choice. Additionally using spacers gives the car a wider track and helps with cornering. Others like myself do it to get rid of that sunken in look the stock wheels have. I really like the stock bullits so this was the only way to get the look I want and keep the bullits.
The biggest myth about spacers is that they're unsafe. If you use the proper spacer application for your setup you will not have problems. The only mishaps I found while looking online were from people that ran spacers like the one's in pic 3 without getting longer studs. From my understanding if your going to keep your stock studs and not use an adapter style spacer like in pic 1 your the biggest spacer you can run is a 1/4. If you go any bigger your supposed run an adapter type spacer or get longer studs.
I previously had some lugcentric spacer I got off ebay. While I didn't have any problems with them I decided to play it safe and get the more favored option. My main reason for getting these though is that now when I go to the track instead of having to unbolt all the spacers before installing my track tires I can just slide the spacers off and on. With the old spacers it was like having to switch eight tires.
I chose to buy mine from "MustangWheelSpacers". I heard about them in another forum and people seemed to be happy and trouble free running their spacers. Plus I liked the fact they provide you with the stud removal and stud install tool. Customer service was also top notch. I called them a few times to ask some tech questions and they were really helpful.
Here's some pics I found online of both types of spacers.
Hubcentric (Keeps your stock studs)
Lugcentric (Keeps stock studs) These are the like my old spacers.
Hubcentric (Replace stock studs) This is the set I bought.
Backend of a hubcentric spacer. Lugcentic spacers don't have that indentation.
With out further ado......
MUSTANG WHEEL SPACER INSTALL
TOOLS NEEDED
Jack
Jack stands
Lug nut wrench
15MM socket
19MM socket
27MM socket
�” socket wrench
�” breaker bar
Stud removal tool (Included in spacer kit)
Stud install tool (Included in spacer kit)
*****MAKE SURE THAT ONCE YOU REMOVE THE CALIPERS FROM THE ROTOR YOU DO NOT PRESS THE BRAKES. IF YOU DO THIS YOU WILL NEED TO MAKE A TRIP TO YOUR LOCAL AUTOZONE AND RENT A BRAKE PISTON COMPRESSING TOOL. YOU WILL NOT BE ABLE TO COMPRESS THE REAR PISTONS WITH A C-CLAMP. DON’T ASK ME HOW I KNOW.*****
Rear Wheel Spacer Install
STEP 1
Jack up rear of the car and remove wheels.
STEP 2
Remove caliper bolts with 15mm socket.
STEP 3
Remove Caliper. Have something to support it standing by.
STEP 4
Remove rotor. (Note: Iif this is your first time removing the calipers you will have remove a couple of clips around the studs using a pair of dikes. If rotor stuck or frozen use a hammer to shock the hat area between studs.)
STEP 5
Using stud removal tool remove all 5 studs.
Note: In order to remove studs they will need to be pushed out through this hole located on the back of the hub. Picture below.
Comparison shot of stock studs and new studs.
STEP 6
Insert new studs through same hole that you used to remove the stock ones. Get them all in before you start drawing them in. Using the stud install tool draw the studs in one at a time. You will know when the studs are seated when they’re flush with the back of the hub and you are no longer be able to turn the socket wrench.
Note: Stud install tool must go on new stud with the non threaded part first. Picture showing non threaded side below.
STEP 7
Once all studs are installed and flush like the stud on the right in the pic below reinstall caliper then install spacer. After that put your wheel back on and repeat steps 1-7 on opposite side. Rear spacer install is now complete.
Front Wheel Spacer Install
STEP 1
Jack up front side the of the car and remove wheel.
STEP 2
Remove caliper bolts with 15mm socket.
STEP 3
Remove Caliper. Have something to support it standing by.
STEP 4
Remove rotor. (Note: Iif this is your first time removing the calipers you will have remove a couple of clips around the studs using a pair of dikes. If rotor stuck or frozen use a hammer to shock the hat area between studs.)
STEP 5
Using stud removal tool remove all 5 studs.
STEP 6
Insert new studs through same hole that you used to remove the stock ones. Get them all in before you start drawing them in. Using the stud install tool draw the studs in one at a time. You will know when the studs are seated when they’re flush with the back of the hub and you are no longer be able to turn the socket wrench.
Note: The front wheel studs can only be installed with the straight edge side of the stud facing in the direction of the pic below.
In order to fully tighten the studs you will need a friend to help keep the hub from spinning. If you’re a one man show like myself you can use a tire iron as show below.
STEP 7
Once all studs are installed and flush like the stud on the right in the pic below reinstall caliper then install spacer. After that put your wheel back on and repeat steps 1-7 on opposite side. Front spacer install is now complete.
Finished!!!!!
Last edited by LEO_06GT; 9/6/08 at 01:30 PM.
 9/6/08, 12:05 PM
#6

Great job on the 'How-To' Leo! Car looks great with the spacers on!! 
With your permission, I'll add it to the how-to sticky.

Oh btw, that's one massive flag antenna ya got there!
With your permission, I'll add it to the how-to sticky.
Oh btw, that's one massive flag antenna ya got there!
9/6/08, 01:16 PM
#11
Legacy TMS Member
Thread Starter
Join Date: May 24, 2006
Location: San Diego
Posts: 7,409
Likes: 0
Received 0 Likes
on
0 Posts
Thanks for all the Kudo's from everyone.
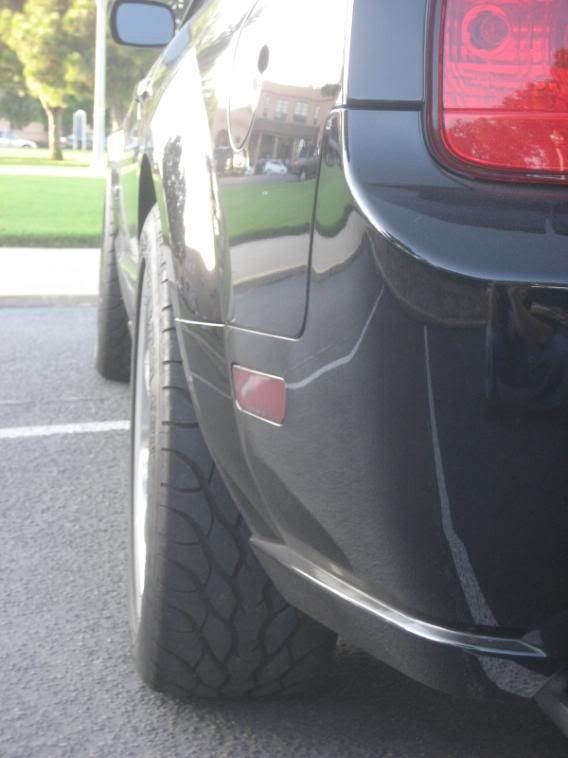
Not the greatest pics but best I could find pre-spacers. Notice how the wheels aren't flush with the fenders like the pics above.


Not the greatest pics but best I could find pre-spacers. Notice how the wheels aren't flush with the fenders like the pics above.
Last edited by LEO_06GT; 9/6/08 at 01:17 PM.
9/6/08, 10:04 PM
#15
Legacy TMS Member

 9/6/08, 10:11 PM
#16
Legacy TMS Member
Thread Starter
Join Date: May 24, 2006
Location: San Diego
Posts: 7,409
Likes: 0
Received 0 Likes
on
0 Posts
 There's always the comedians in the group.
9/7/08, 04:30 PM
There's always the comedians in the group.
9/7/08, 04:30 PM
#17
Cobra Member
Join Date: August 5, 2008
Location: Arvada, CO
Posts: 1,369
Likes: 0
Received 0 Likes
on
0 Posts
Looking at the before pics, even more dramatic than I thought.
Any safety concerns with these type of spacers? I've heard people tracking cars shouldn't use them.
Opinions?
Any safety concerns with these type of spacers? I've heard people tracking cars shouldn't use them.
Opinions?
9/7/08, 07:33 PM
#18
Legacy TMS Member
Thread Starter
Join Date: May 24, 2006
Location: San Diego
Posts: 7,409
Likes: 0
Received 0 Likes
on
0 Posts
Like I stated above spacers are safe so long as you use the right ones. There are many Auto X guys that use spacers without any problems. I'm not an expert on the subject by any means and am just saying what I've learned through reading through several forums. Do your own research then decide for yourself.

