Prothane Bullet Motor Mount install (w/pics and vids)
 12/23/07, 11:18 PM
#1
Thread Starter

Prothane Bullet Motor Mount install (w/pics and vids)
This 'How-To' will cover the installation of the Prothane motor mounts.
The installation of these mounts will firm up the rigidity of the engine dampening as compared to the factory fluid mounts.
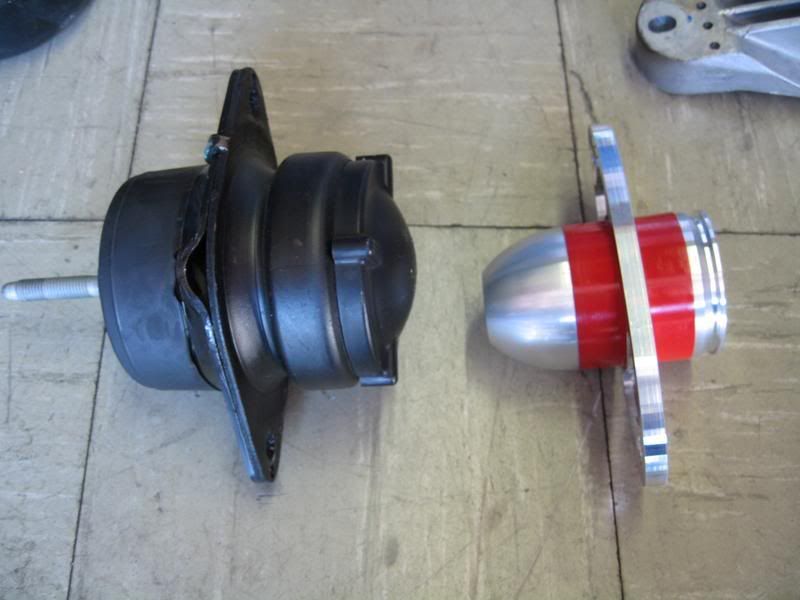
Prothane currently offers these mounts in either Red or Black polyurethane bushings. There is no difference in hardness between the 2 colors.
Tools required:
13mm & 15mm sockets
8mm Allen head socket
Universal joint adapter (swivel socket)
Socket extensions (longer the better)
7mm wrench or deep socket (for Negative battery terminal)
Torque wrench capable of up to 41 lb-ft.
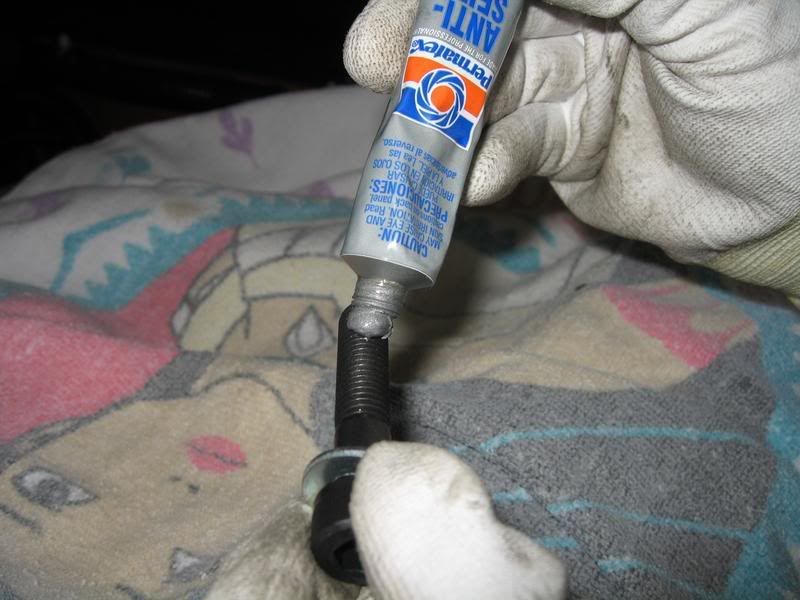
Anti-seize lube
Estimated install time:
1-2 hours
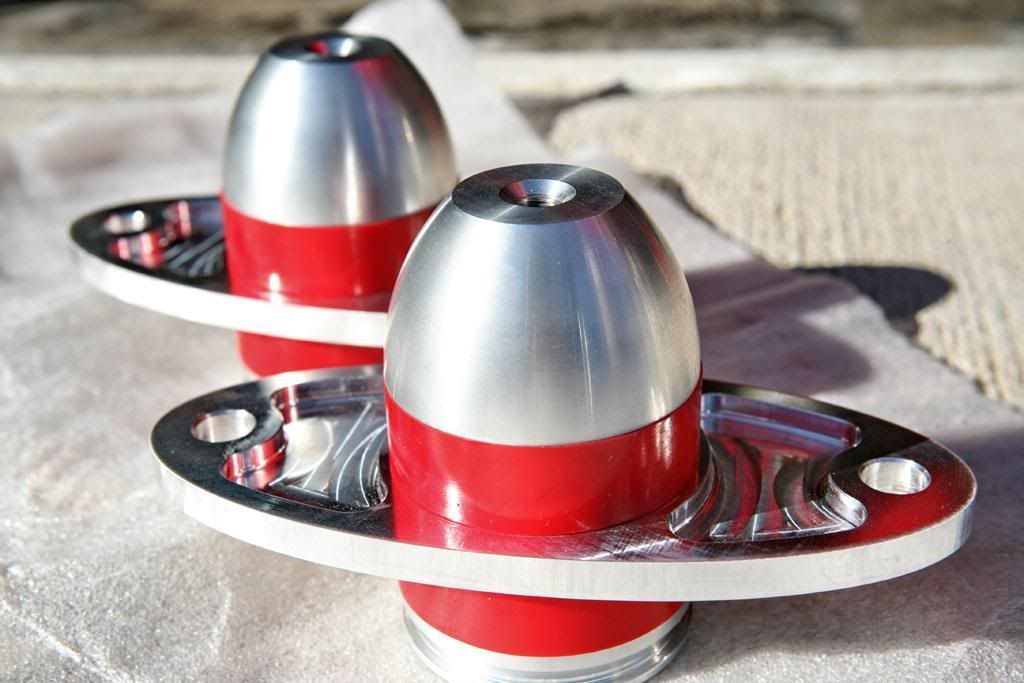
Out of the box:

Installation:
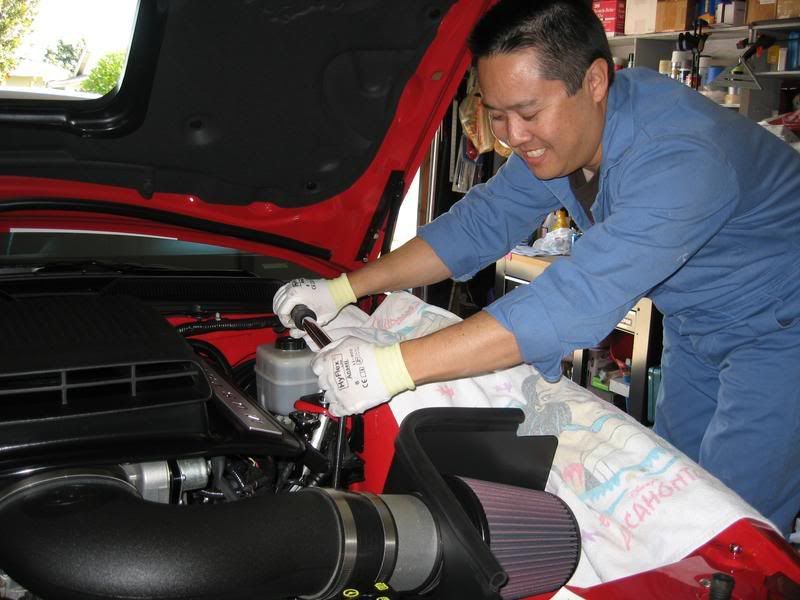
1. Jack the front end of the car high enough for you to have access underneath. Always use jackstands and wheel chocks at the back tire.
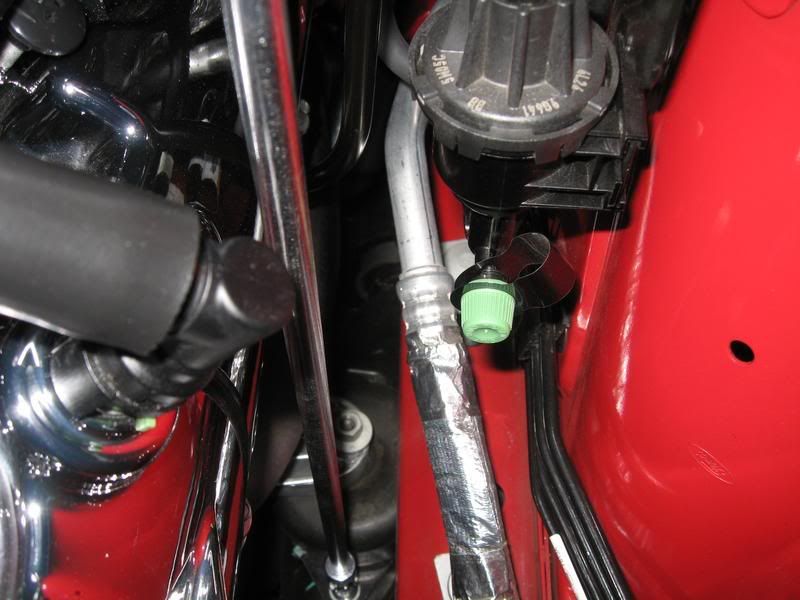
Note: Take a look in your engine bay and see what components (if any) will need to be loosened/removed when the engine is jacked up. In my case, I loosened the C&L CAI heatshield just incase.
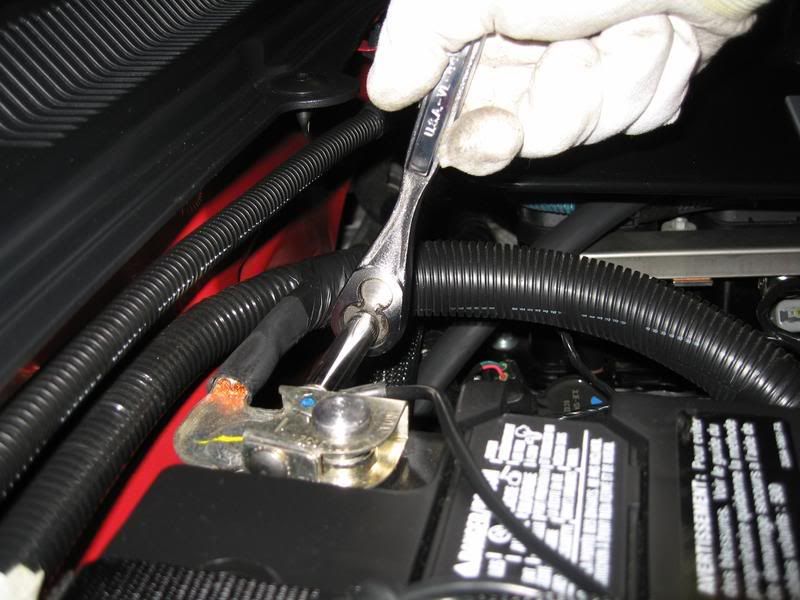
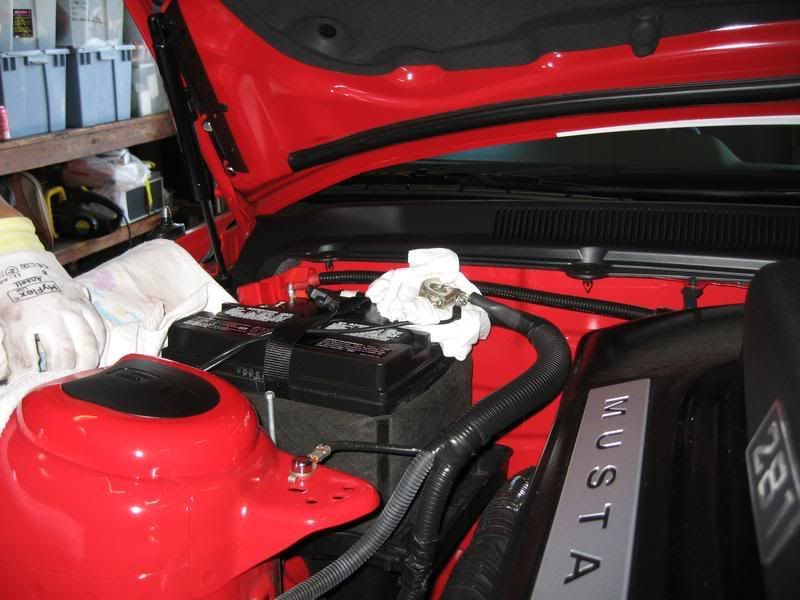
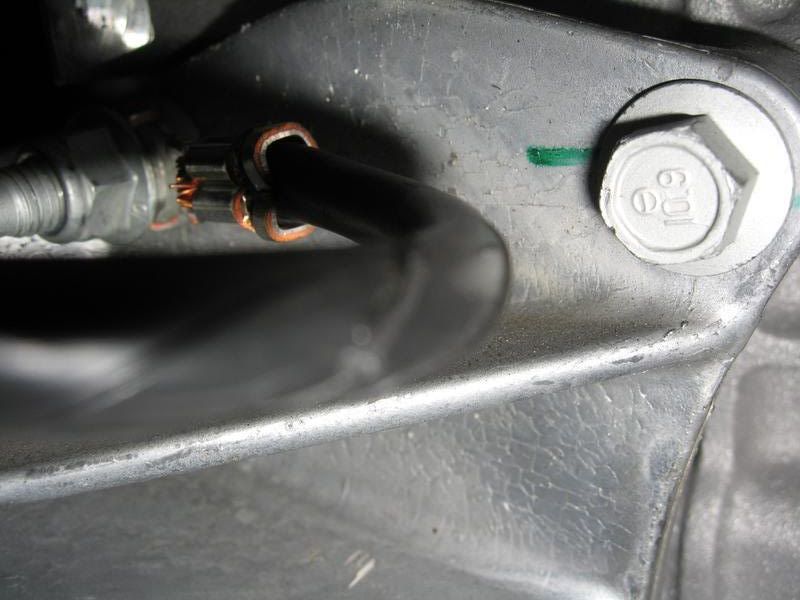
2. Disconnect the Negative battery terminal. This is due to the fact that the starter is very close to the Passenger side engine support bracket. It's primarily for safety.
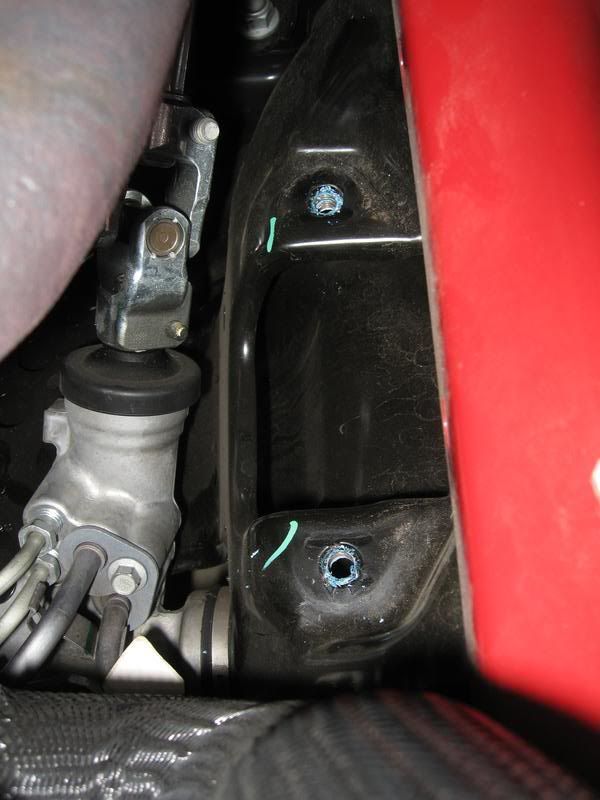
3. Doing 1 mount at a time, starting with the Drivers side, locate the factory motor mount.
4. Loosen the center engine support isolator nut and the 2 side mounting bolts, but do not remove at this point. Be sure to adequately loosen these fasteners.
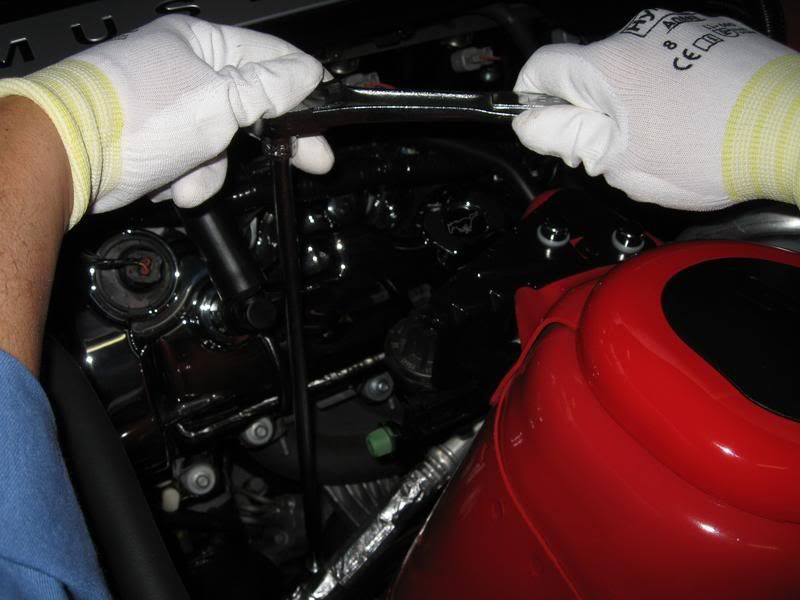
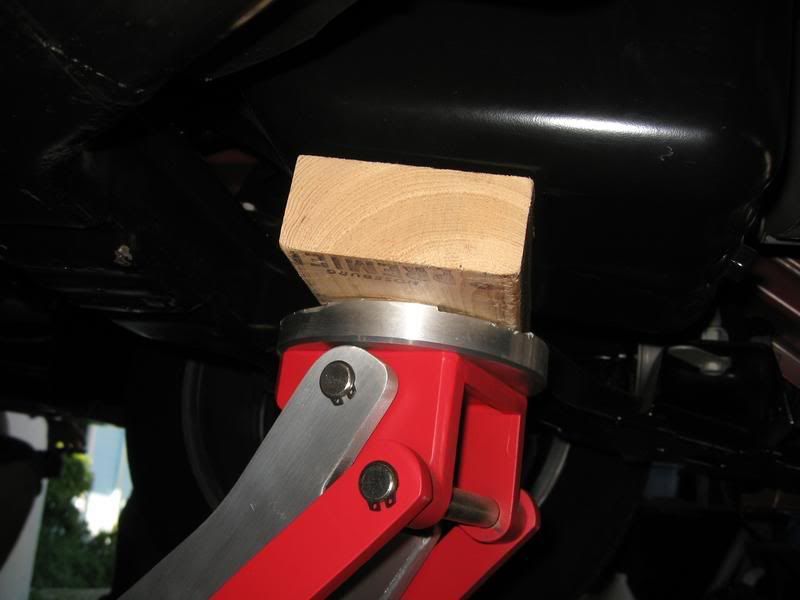
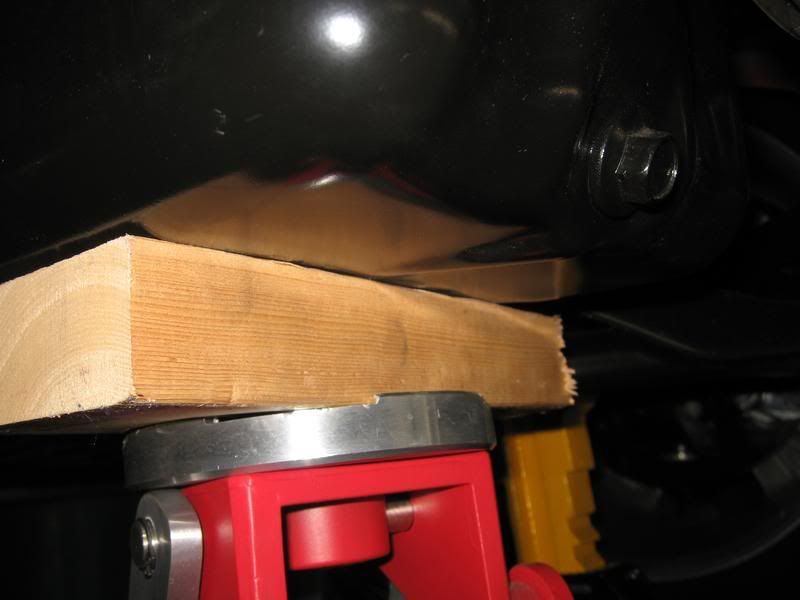
5. The engine will need to go up approximately �" to replace the mounts. Using a floor jack, I used a piece of 2x4 wood and carefully placed it under the oil pan, just forward of the drain plug. Be careful not to place the 2x4 under the drain valley of the drain plug.
Jack the engine up only �".
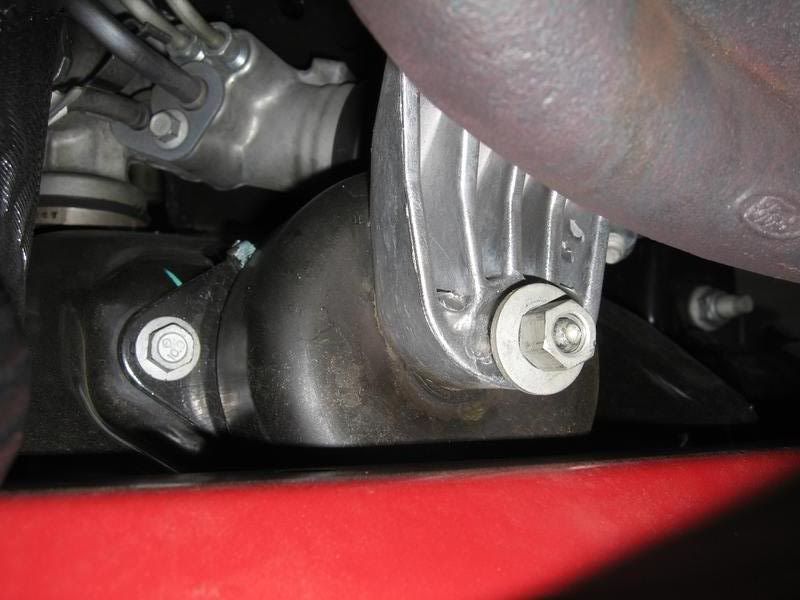
6. Locate the engine support bracket and remove the 4 bolts attaching it to the engine block. Use of a swivel socket and long extensions may be necessary.
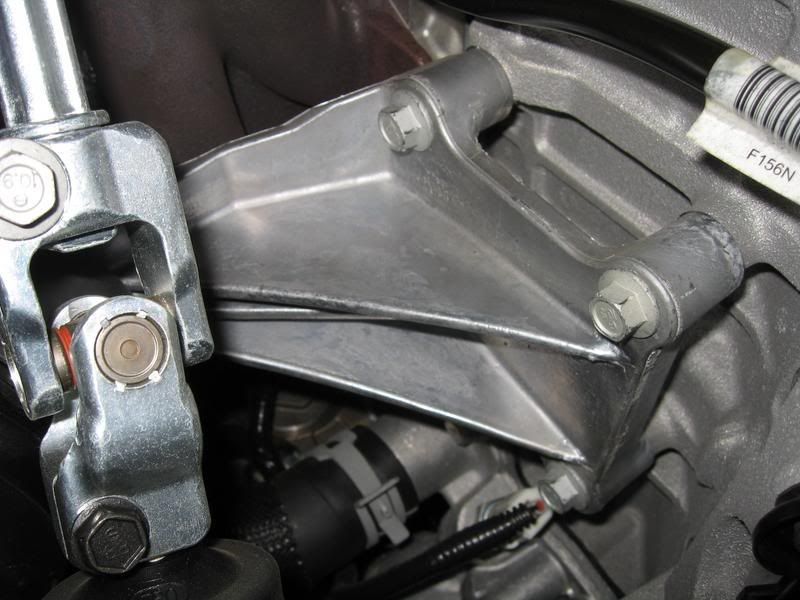
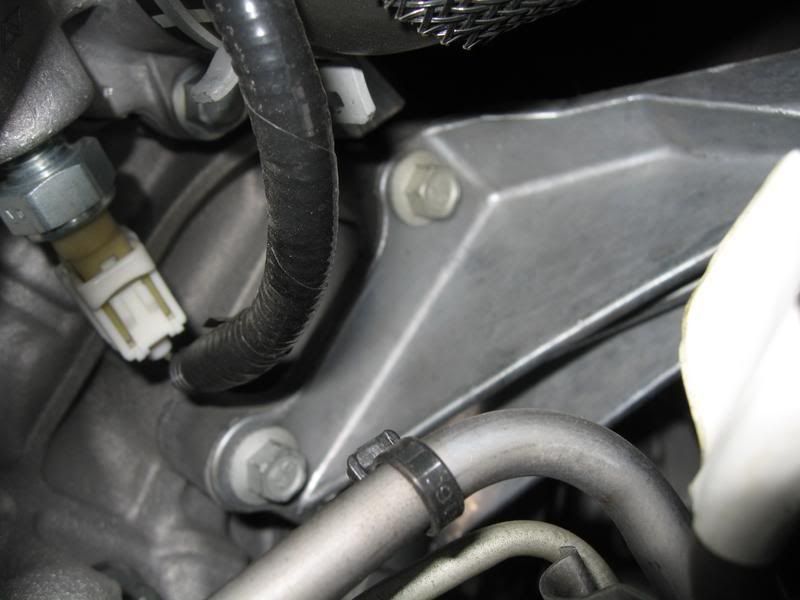
7. Remove the center engine support isolator nut and the 2 side mounting bolts (from Step 4) and carefully remove both the engine support bracket and the factory motor mount out from under the car.
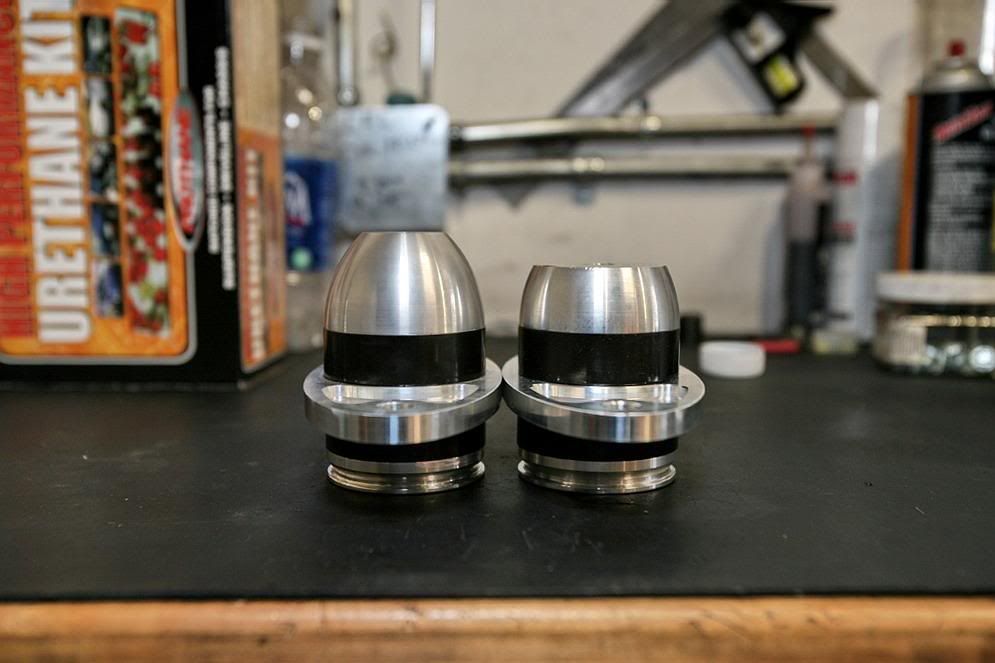
8. Side by side comparison.

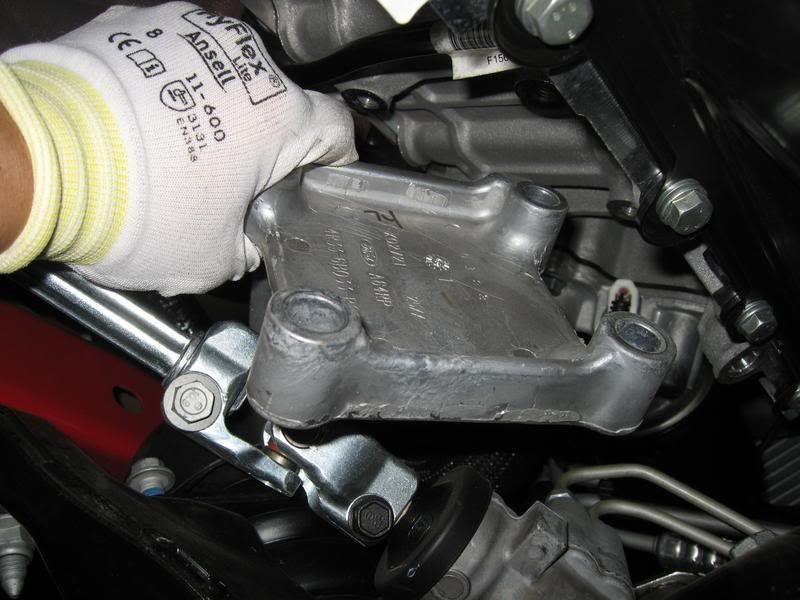
9. Position the new Prothane mount into position (there is no left/right or forward/aft orientation) and hand tighten the 2 side mounting bolts (re-use the factory bolts).
Also, re-install the engine support bracket onto the engine block using the same factory bolts. Torque these bolts to 41 lb-ft.
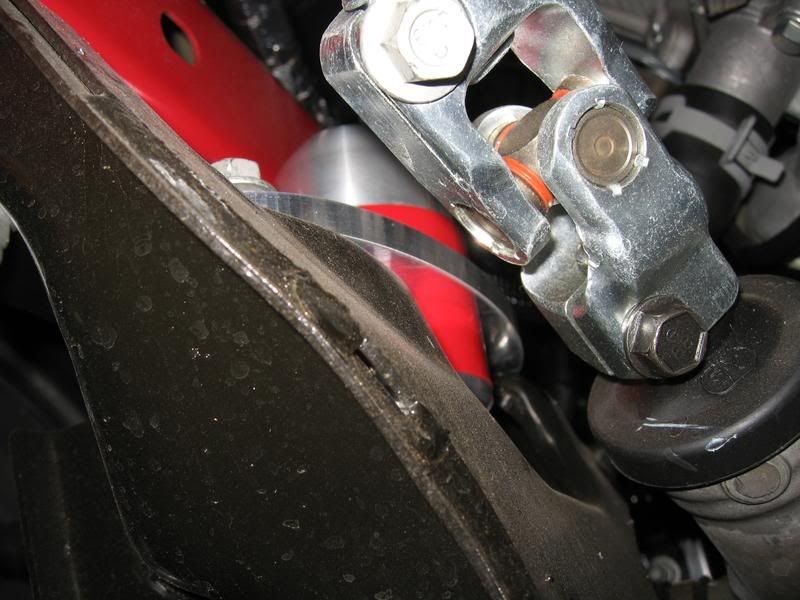
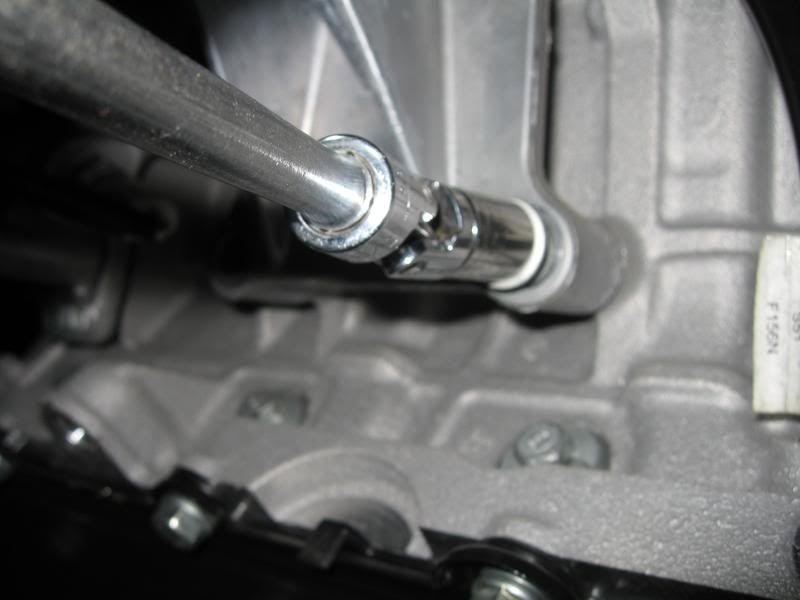
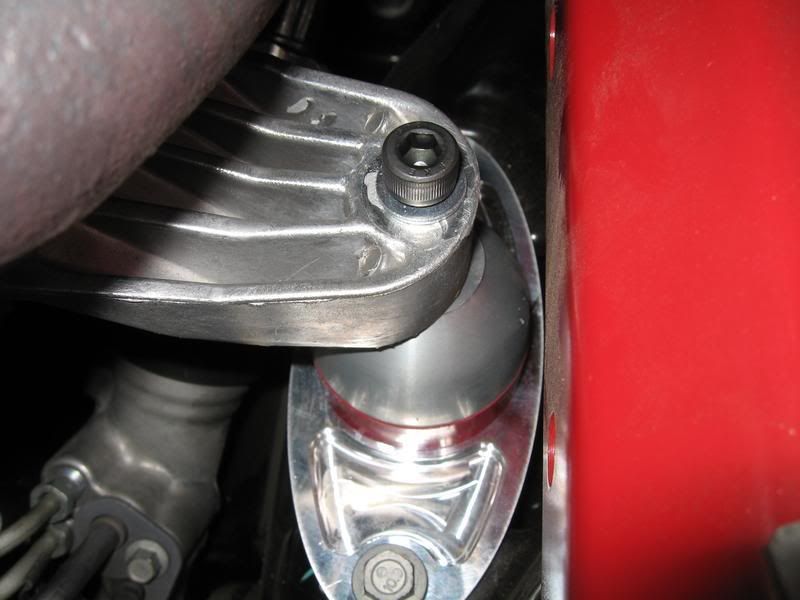
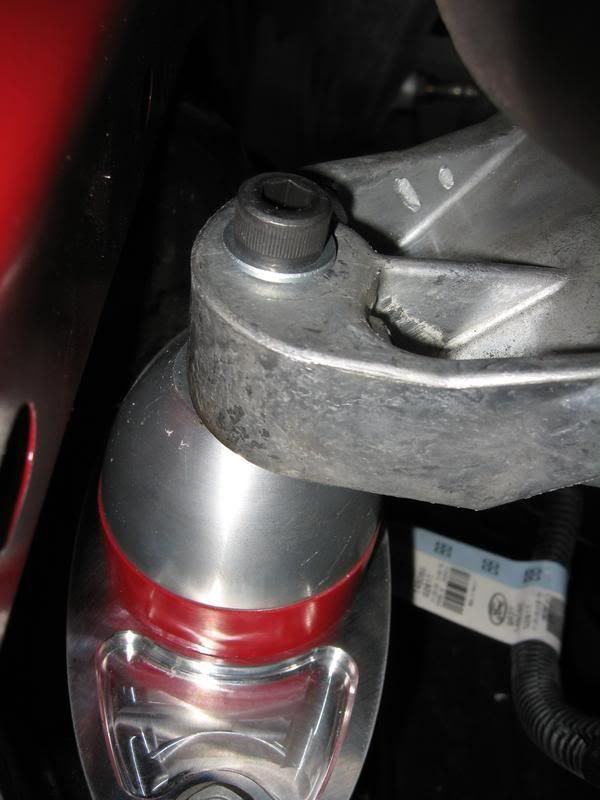
10. Apply anti-seize lube to the supplied socket head bolt (with the supplied silver flat washer) and install it though the engine support bracket and the Prothane mount, hand tighten only.
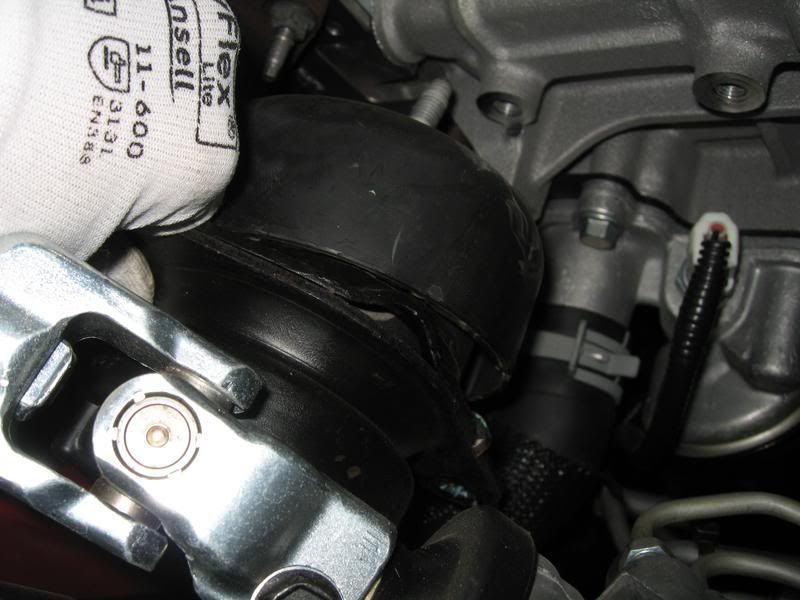
11. Lower the engine back down onto the mount.
Torque the 2 side mounting bolts to 41 lb-ft.
Torque the center socket head bolt to 30 lb-ft.
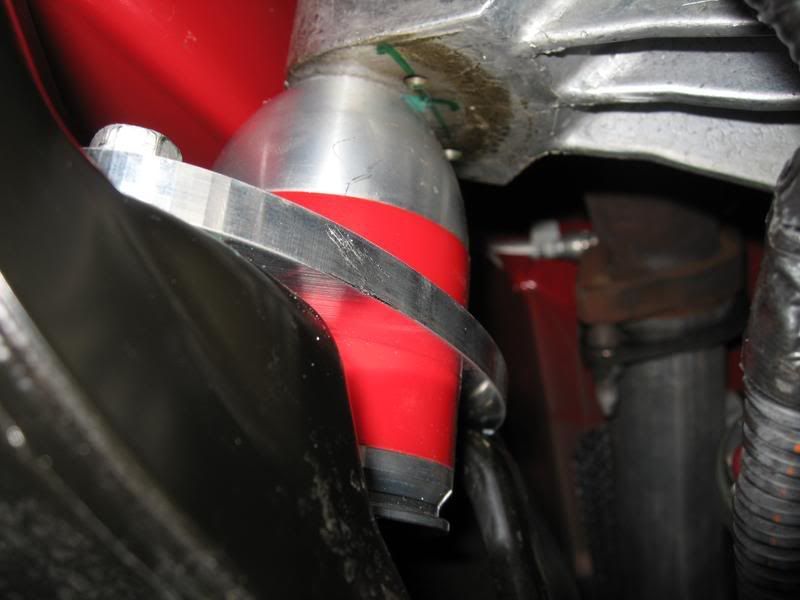
(And yes, that's my custom Pocahontas fender cover.)
Drivers side complete!
12. Passenger side. Installation is the same as the Drivers side with the following exceptions;
The top-aft fastener in the engine support bracket is a stud bolt. Nothing was attached to mine; deep well socket is needed to remove this bolt.
Note: Take note on how close the starter cable is to the bracket; this is the reason why the Negative battery cable is disconnected.
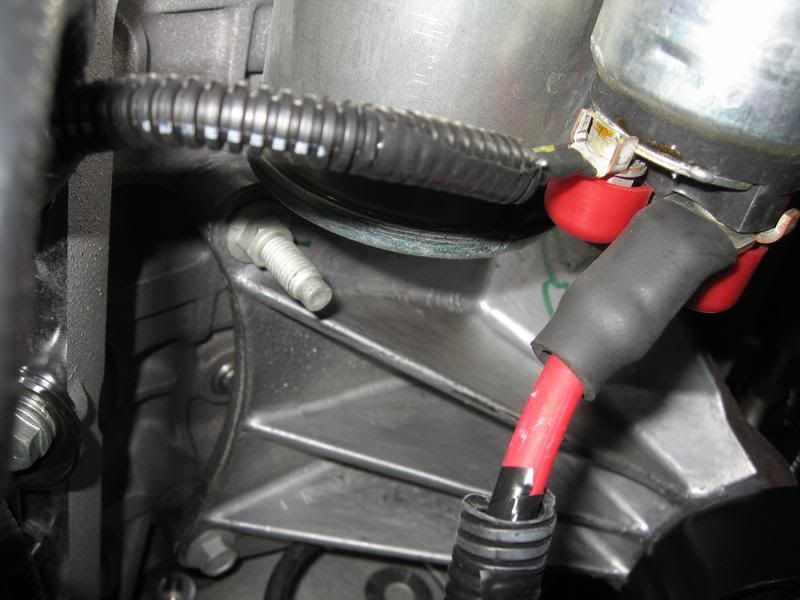
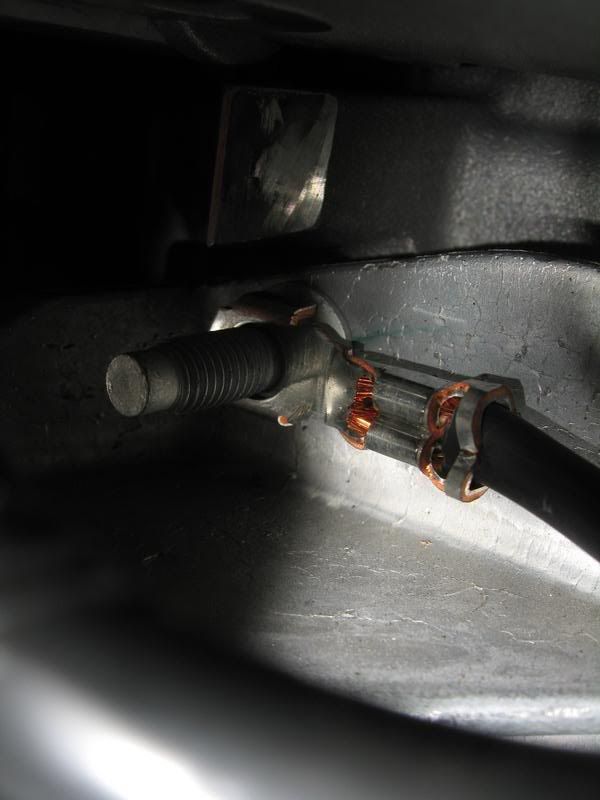
The top-forward fastener in the engine support bracket has a ground cable attached to the stud bolt. The cable must be removed first prior to removing the stud bolt. Access will be tight because of a wire conduit, but it can be done.
Reconnect the Negative battery cable and check the engine bay for tools before starting the engine.
Installation complete!
Start-up - rev video: hood open
Start-up - rev video: hood closed

Final thoughts...
I'm very happy with them. It has the perfect amount of 'feel' of the engine, not too harsh and not too mellow (like the stock mounts), best description is that it feels 'tight'.
My initial reaction to the Prothanes in JedCranium's Roush was a lot more 'wow!' possibly because he's running cats, thus any addt'l vibrations can be felt alot more. On mine, with the O/R-H, it already vibrated the interior to a degree, which is the reason why I'm guessing it's not a huge difference.
In reality, only a slight vibration is felt on start-up and some during low rpm driving. What is very noticable is that the engine no longer torques side-to-side when revving it up, but rather the WHOLE car now can be seen and felt torquing (maybe 1/2").
The installation of these mounts will firm up the rigidity of the engine dampening as compared to the factory fluid mounts.
Prothane currently offers these mounts in either Red or Black polyurethane bushings. There is no difference in hardness between the 2 colors.
Tools required:
13mm & 15mm sockets
8mm Allen head socket
Universal joint adapter (swivel socket)
Socket extensions (longer the better)
7mm wrench or deep socket (for Negative battery terminal)
Torque wrench capable of up to 41 lb-ft.
Anti-seize lube
Estimated install time:
1-2 hours
Out of the box:
Installation:
1. Jack the front end of the car high enough for you to have access underneath. Always use jackstands and wheel chocks at the back tire.
Note: Take a look in your engine bay and see what components (if any) will need to be loosened/removed when the engine is jacked up. In my case, I loosened the C&L CAI heatshield just incase.
2. Disconnect the Negative battery terminal. This is due to the fact that the starter is very close to the Passenger side engine support bracket. It's primarily for safety.
3. Doing 1 mount at a time, starting with the Drivers side, locate the factory motor mount.
4. Loosen the center engine support isolator nut and the 2 side mounting bolts, but do not remove at this point. Be sure to adequately loosen these fasteners.
5. The engine will need to go up approximately �" to replace the mounts. Using a floor jack, I used a piece of 2x4 wood and carefully placed it under the oil pan, just forward of the drain plug. Be careful not to place the 2x4 under the drain valley of the drain plug.
Jack the engine up only �".
6. Locate the engine support bracket and remove the 4 bolts attaching it to the engine block. Use of a swivel socket and long extensions may be necessary.
7. Remove the center engine support isolator nut and the 2 side mounting bolts (from Step 4) and carefully remove both the engine support bracket and the factory motor mount out from under the car.
8. Side by side comparison.
9. Position the new Prothane mount into position (there is no left/right or forward/aft orientation) and hand tighten the 2 side mounting bolts (re-use the factory bolts).
Also, re-install the engine support bracket onto the engine block using the same factory bolts. Torque these bolts to 41 lb-ft.
10. Apply anti-seize lube to the supplied socket head bolt (with the supplied silver flat washer) and install it though the engine support bracket and the Prothane mount, hand tighten only.
11. Lower the engine back down onto the mount.
Torque the 2 side mounting bolts to 41 lb-ft.
Torque the center socket head bolt to 30 lb-ft.
(And yes, that's my custom Pocahontas fender cover.)
Drivers side complete!
12. Passenger side. Installation is the same as the Drivers side with the following exceptions;
The top-aft fastener in the engine support bracket is a stud bolt. Nothing was attached to mine; deep well socket is needed to remove this bolt.
Note: Take note on how close the starter cable is to the bracket; this is the reason why the Negative battery cable is disconnected.
The top-forward fastener in the engine support bracket has a ground cable attached to the stud bolt. The cable must be removed first prior to removing the stud bolt. Access will be tight because of a wire conduit, but it can be done.
Reconnect the Negative battery cable and check the engine bay for tools before starting the engine.
Installation complete!
Start-up - rev video: hood open
Start-up - rev video: hood closed
Final thoughts...
I'm very happy with them. It has the perfect amount of 'feel' of the engine, not too harsh and not too mellow (like the stock mounts), best description is that it feels 'tight'.
My initial reaction to the Prothanes in JedCranium's Roush was a lot more 'wow!' possibly because he's running cats, thus any addt'l vibrations can be felt alot more. On mine, with the O/R-H, it already vibrated the interior to a degree, which is the reason why I'm guessing it's not a huge difference.
In reality, only a slight vibration is felt on start-up and some during low rpm driving. What is very noticable is that the engine no longer torques side-to-side when revving it up, but rather the WHOLE car now can be seen and felt torquing (maybe 1/2").
Last edited by TacoBill; 3/14/08 at 12:28 PM. Reason: sp
 12/24/07, 12:02 AM
#4
Shelby GT500 Member
Join Date: November 22, 2006
Location: Planet Earth
Posts: 2,932
Likes: 0
Received 0 Likes
on
0 Posts
Prothane!
Great write up as always Bill  You know the more and more I drive my car I love the feeling those mounts give. It's the same feeling I get with the MGW shifter, man connected to machine! I originaly installed these due to my Steeda Strut tower brace to clear the CAI.

The lower CG and the muscle car feel was secondary and not realized in the begining but soon that sensation felt awesume! Bill and I highly recommend this mod it takes a day to get use to it but after that you won't look back
To answer 302svt post I don't think these will get "soft" over time. There not made of rubber it looks more like solid polyurethane.
Here is a comparison of the JDM "lowered" Prothane mount and the standard mount (both black). The engine lowers a 1/2 inch.
Jed
You know the more and more I drive my car I love the feeling those mounts give. It's the same feeling I get with the MGW shifter, man connected to machine! I originaly installed these due to my Steeda Strut tower brace to clear the CAI. The lower CG and the muscle car feel was secondary and not realized in the begining but soon that sensation felt awesume! Bill and I highly recommend this mod it takes a day to get use to it but after that you won't look back
To answer 302svt post I don't think these will get "soft" over time. There not made of rubber it looks more like solid polyurethane.
Here is a comparison of the JDM "lowered" Prothane mount and the standard mount (both black). The engine lowers a 1/2 inch.
Jed
12/24/07, 03:17 AM
#5
Legacy TMS Member
Join Date: January 9, 2005
Location: New Carlisle, Ohio (20 miles north of Dayton)
Posts: 6,982
Likes: 0
Received 6 Likes
on
6 Posts
Outstanding write up as always Bill.  Mine are on the way. They will be part of my header install. Hope for that to happen the first Saturday in Jan.
Scott
Mine are on the way. They will be part of my header install. Hope for that to happen the first Saturday in Jan.Scott
12/24/07, 01:15 PM
#7
Legacy TMS Member
Join Date: May 24, 2006
Location: San Diego
Posts: 7,409
Likes: 0
Received 0 Likes
on
0 Posts
12/24/07, 01:26 PM
#9
Couple of additional items worth mentioning:
- After installation of the mounts is complete, be sure to measure the distance from the outside of the mount to the frame on both sides. The aluminum mounts have a lot of clearance around the bolt and the engine may need to be centered between the frame rails. If so, loosen the socket head cap screw, use a bar and pry the mount towards the other side of the frame until it is centered, then retighten the socket head cap screw. This is usually the problem when the headers contact the steering shaft - the engine needs centering in the frame
- The stud on the passenger's side which has nothing attached to it is for the bracket for the automatic transmission cooler lines. 5 speeds don't have anything attached to this stud
12/24/07, 04:59 PM
#10
Mach 1 Member
Join Date: December 4, 2007
Location: Columbus, OH
Posts: 893
Likes: 0
Received 0 Likes
on
0 Posts
Do mounts put the wasted energy from a twisting engine to the ground?
I assume that's the only performance benefit other than lowering the engine for better handing.
I assume that's the only performance benefit other than lowering the engine for better handing.
12/25/07, 06:52 AM
#13
Thread Starter
Thanks guys!
Thanks for the unput.
My engine was lucky enough to come centered from the factory as I did eyeball the side to side clearance and it looks to be about the same.
I got mine off ebay, Seller offered them in Black or Red.
Couple of additional items worth mentioning:
- After installation of the mounts is complete, be sure to measure the distance from the outside of the mount to the frame on both sides. The aluminum mounts have a lot of clearance around the bolt and the engine may need to be centered between the frame rails. If so, loosen the socket head cap screw, use a bar and pry the mount towards the other side of the frame until it is centered, then retighten the socket head cap screw. This is usually the problem when the headers contact the steering shaft - the engine needs centering in the frame
- The stud on the passenger's side which has nothing attached to it is for the bracket for the automatic transmission cooler lines. 5 speeds don't have anything attached to this stud
My engine was lucky enough to come centered from the factory as I did eyeball the side to side clearance and it looks to be about the same.
I got mine off ebay, Seller offered them in Black or Red.
12/25/07, 09:44 AM
#15
Bullitt Member

Join Date: October 12, 2007
Posts: 397
Likes: 0
Received 0 Likes
on
0 Posts
Haha yeah I like the fender cover too! Great write up as always!
Here's an interesting question...
With access to the right tools and equipment at a shop, don't you think you could install aftermarket headers by doing motor mounts at the same time? Just lifting the motor out enough to gain easy access to the manifold?
Here's an interesting question...
With access to the right tools and equipment at a shop, don't you think you could install aftermarket headers by doing motor mounts at the same time? Just lifting the motor out enough to gain easy access to the manifold?
12/25/07, 05:01 PM
#16
Thread Starter
I would think doing the headers at the same time as the mounts would make things easier. However, I've read nothing but PITA stories on the swap, whether the mounts are there or not.
3/3/08, 07:41 AM
#17
Mach 1 Member

Join Date: July 13, 2007
Location: LaSalle, Ontario
Posts: 687
Likes: 0
Received 11 Likes
on
7 Posts
Just one question about replacing the motor mount.
Do you remove the engine support bracket while under the car? I looked yesterday while preparing a plan for doing mine, and I notcied you cannot see the bolts on the bracket on the engine side while looking from above.
Thanks,
Sean
Do you remove the engine support bracket while under the car? I looked yesterday while preparing a plan for doing mine, and I notcied you cannot see the bolts on the bracket on the engine side while looking from above.
Thanks,
Sean
3/3/08, 08:13 AM
#19
Thread Starter