A Pretty Good Week (Long Thread)
 4/18/11, 07:25 PM
#1
Bullitt Member
Thread Starter

Join Date: January 18, 2010
Location: Woodland Park, CO
Posts: 297
Likes: 0
Received 1 Like
on
1 Post
A Pretty Good Week (Long Thread)
I finally got more than 2 nights in a row at home and made good use of it. Pulled the rear end out to weld up the LCA relocation brackets, install the 3.73's and build a custom breather, then set it back in to mount the watts link and adjustable rear sway bar. Moved on to the transmission to swap in the 6060 and new MGW shifter. While I was still under the car I welded in the BMR subframe connectors. Replaced my shift boot and console cover with some new pieces from Redline goods, installed my UPR billet inner door handles and wired up a relay to automatically turn off traction control when starting the car. Threw in the adjustable front sway bar during the melee. All I have to finish up is the custom oil breather catch can. The car hasn't had a real bath in forever, so I'll get some photos after that happens. of course, I'm back on the road Wednesday.....
I'll also post up some photos of the custom ramp setup I built. It puts all four wheels 9" in the air.
OK - photos! There were major T-storms in the area, so I was in the garage for most of these and the lighting sucked.
I'll start with the ramp setup. I've measured all of this out for the track and wheelbase of the car and built accordingly. This is the first step prior to drive on. Everything is located in place via 1" dowels.
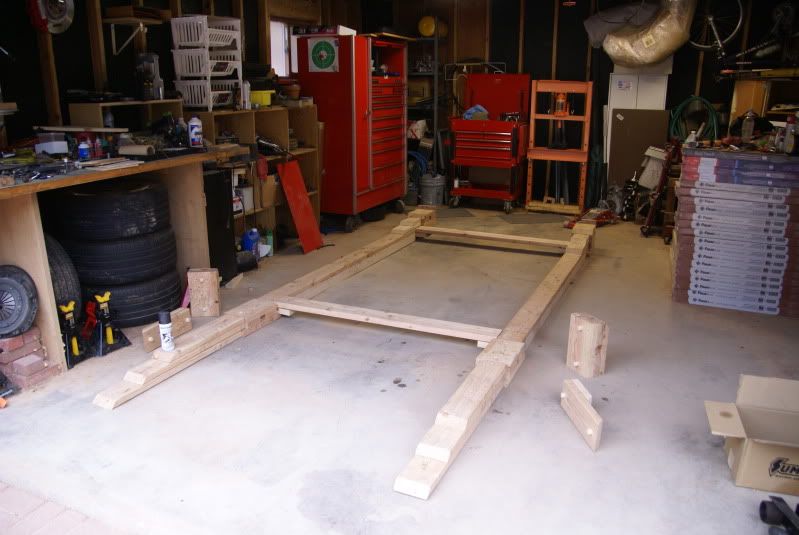
You drive on (or back on) until you're all the way on with the rear wheel (assuming driving on) stopped where the paint can is. At that point you need to fit in the next steps of the ramps. For the Saleens, you need to be that far so the next steps will fit under the side skirts.
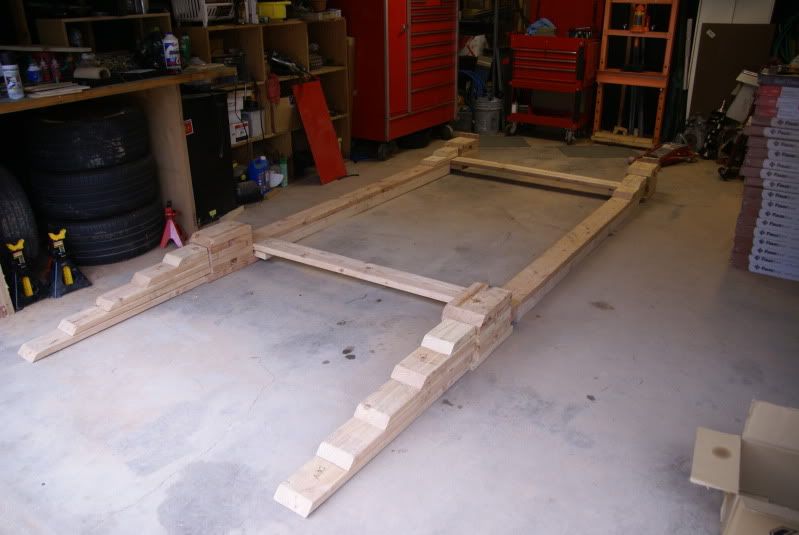
Now you drive the rest of the way on, set the brake and remove all the pieces that will be in your way.
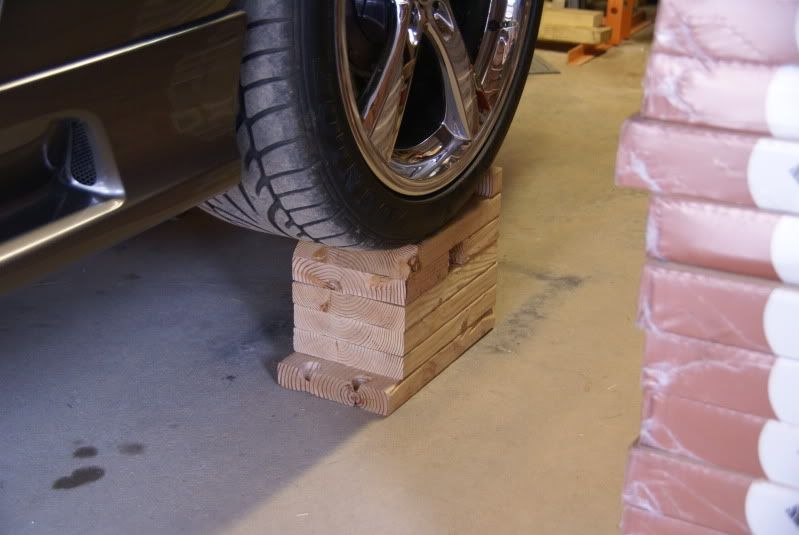
You end up sitting on these on all 4 corners.
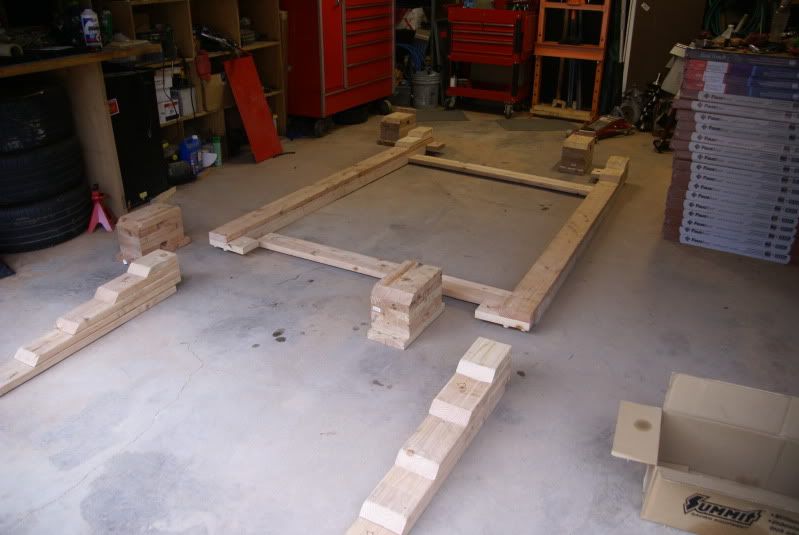
I bought a bunch of other stuff while I was at the Depot, but this is probably $50 worth of material. Yes, it's kind of primitive, but it worked like a champ for all of the above work.
This is a little something I whipped up for my jack handle / lug wrench, because it's almost impossible to raise the car with the supplied wrench (Saleen only). This will attach to the front of my trunk battery box and be secured with velcro straps.
Here's the shot of the rear suspension, and of course I had to paint the axle while it was out. You can also see the subframe connectors. It's a VERY tight fit between the watts link and the FRPP low profile diff cover.

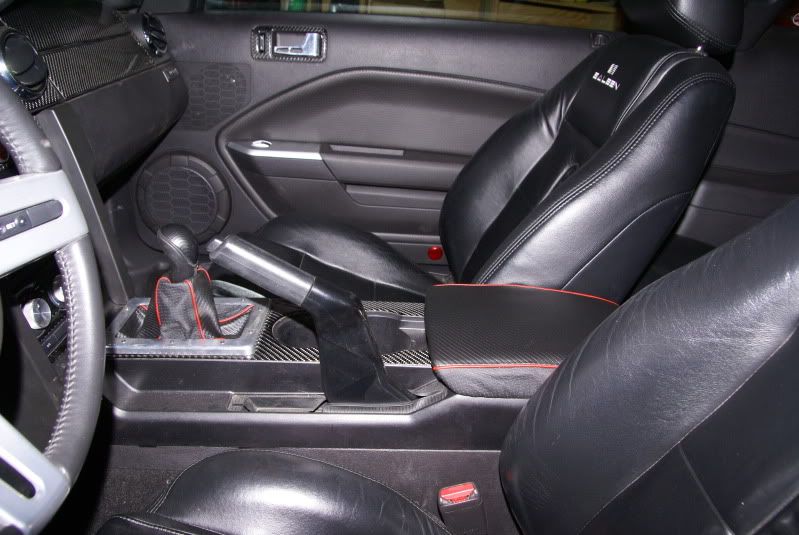
Last shot. The new boot and console cover. Sides are black perforated with the remaining panels black carbon.
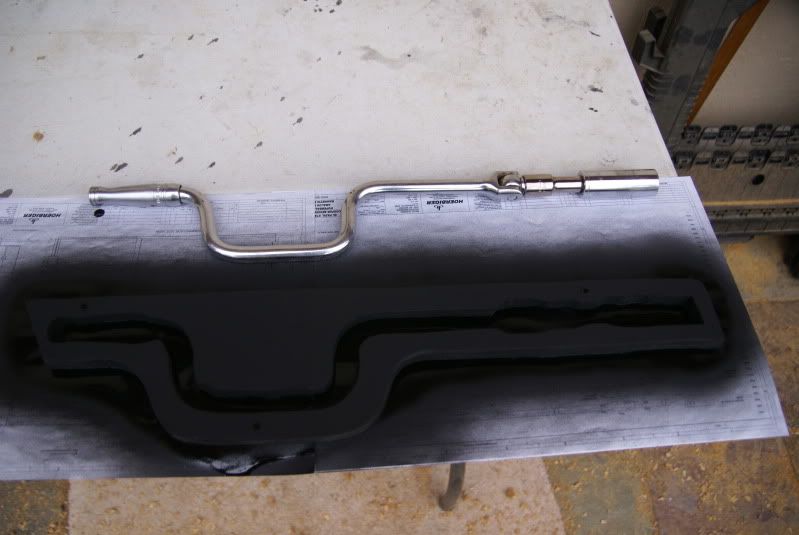
Still working on the catch can, and the axle breather is a collection of Swagelok stuff I rescued from my last job. I removed the cap from the original breather and drilled a press fit for 1/4" tubing, which opens up to a section of 1/2" tubing, then back to an extended piece of 3/8" tubing with the original spring loaded cap attached. It's probably 5" tall at this point, so if this spews any fluid I've got serious issues!
I'll also post up some photos of the custom ramp setup I built. It puts all four wheels 9" in the air.
OK - photos! There were major T-storms in the area, so I was in the garage for most of these and the lighting sucked.
I'll start with the ramp setup. I've measured all of this out for the track and wheelbase of the car and built accordingly. This is the first step prior to drive on. Everything is located in place via 1" dowels.
You drive on (or back on) until you're all the way on with the rear wheel (assuming driving on) stopped where the paint can is. At that point you need to fit in the next steps of the ramps. For the Saleens, you need to be that far so the next steps will fit under the side skirts.
Now you drive the rest of the way on, set the brake and remove all the pieces that will be in your way.
You end up sitting on these on all 4 corners.
I bought a bunch of other stuff while I was at the Depot, but this is probably $50 worth of material. Yes, it's kind of primitive, but it worked like a champ for all of the above work.
This is a little something I whipped up for my jack handle / lug wrench, because it's almost impossible to raise the car with the supplied wrench (Saleen only). This will attach to the front of my trunk battery box and be secured with velcro straps.
Here's the shot of the rear suspension, and of course I had to paint the axle while it was out. You can also see the subframe connectors. It's a VERY tight fit between the watts link and the FRPP low profile diff cover.
Last shot. The new boot and console cover. Sides are black perforated with the remaining panels black carbon.
Still working on the catch can, and the axle breather is a collection of Swagelok stuff I rescued from my last job. I removed the cap from the original breather and drilled a press fit for 1/4" tubing, which opens up to a section of 1/2" tubing, then back to an extended piece of 3/8" tubing with the original spring loaded cap attached. It's probably 5" tall at this point, so if this spews any fluid I've got serious issues!

 4/28/11, 01:01 PM
#3
Bullitt Member
Thread Starter
Join Date: January 18, 2010
Location: Woodland Park, CO
Posts: 297
Likes: 0
Received 1 Like
on
1 Post
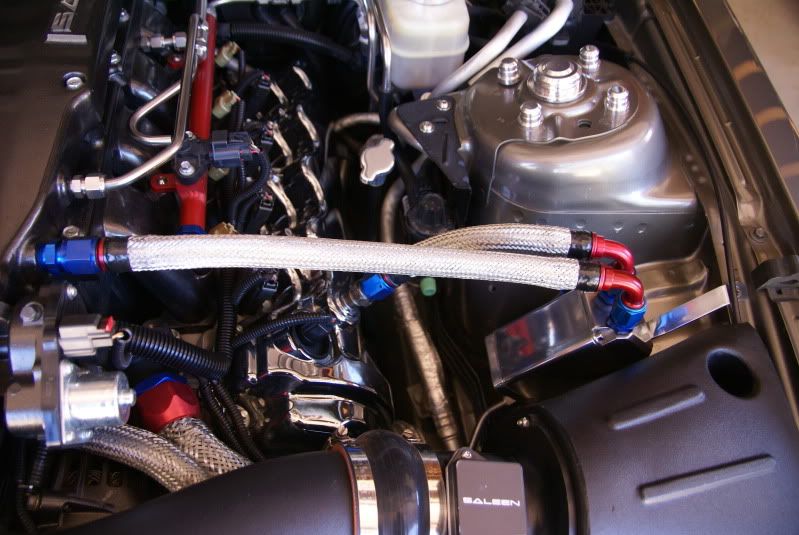
I took a break from working on the house and finished up the breather. As always, if it ain't got some bling, I can't make it sing!
I bought one of these in the polished version, then shortened it 1 1/2", moved some holes and added some synthetic stainless steel media inside to catch the vapors. Fabbed up a new bracket and a stainless drain line out the bottom with a petcock to make it easy. I just need to get some large shrink tubing to finish the ends of the braid.
http://cgi.ebay.com/ebaymotors/ws/eB...m=170633205804

Thread
Thread Starter
Forum
Replies
Last Post
ssjbuu
Repair and Service Help
6
8/28/15 08:55 AM